Welcome to the easiest way to build secure workloads available in the AWS Marketplace today! Our Linux AMIs are designed to fit into your standard build processes as you use today, with as few changes as possible to the way you do things.
Important Note About Security
While we provide STIG compliance as a core part of our AMI package, we are not responsible for ensuring the security or availablilty of your data and systems. There are very important considerations that you need to make while using our products to ensure you maintain compliance with all Federal and State regulations, and to ensure that your systems are not compromised and your data is secure to the greatest extent possible.
- Our AMIs store your application and configuration information on Elastic Block Store volumes. By default, when creating EC2 images, these EBS volumes are not encrypted. It is up to you, during build and deployment time, to ensure that these encryption settings are configured correctly. Please pay close attention to the EBS instructions below to ensure you enable data-at-rest encryption on your instance, or you may be vulnerable to data exfiltration down the road.
- In cases where your AMI provides a frontend to a corresponding backend data service, it is entirely up to you to ensure you are using the correct network encryption algorithms on the connection between your AMI and its backend services, and that you are encrypting the data-at-rest within these services in a compliant and secure manner. Neither Nému Corporation, nor its employees or contractors, are responsible for the complete security of your system.
- Our default base AMIs do not provide any cryptographic services that require key rotation, other than the SSH key that is used to access your instance. Please refer to Amazon's documentation on recommended solutions for keypair rotation and management.
- Once your instance is up and running, it can be monitored using standard AWS tools, such as AWS CloudWatch. Please refer to Amazon's documentation on best practices and recommended monitoring procedures.
Manual Build Process
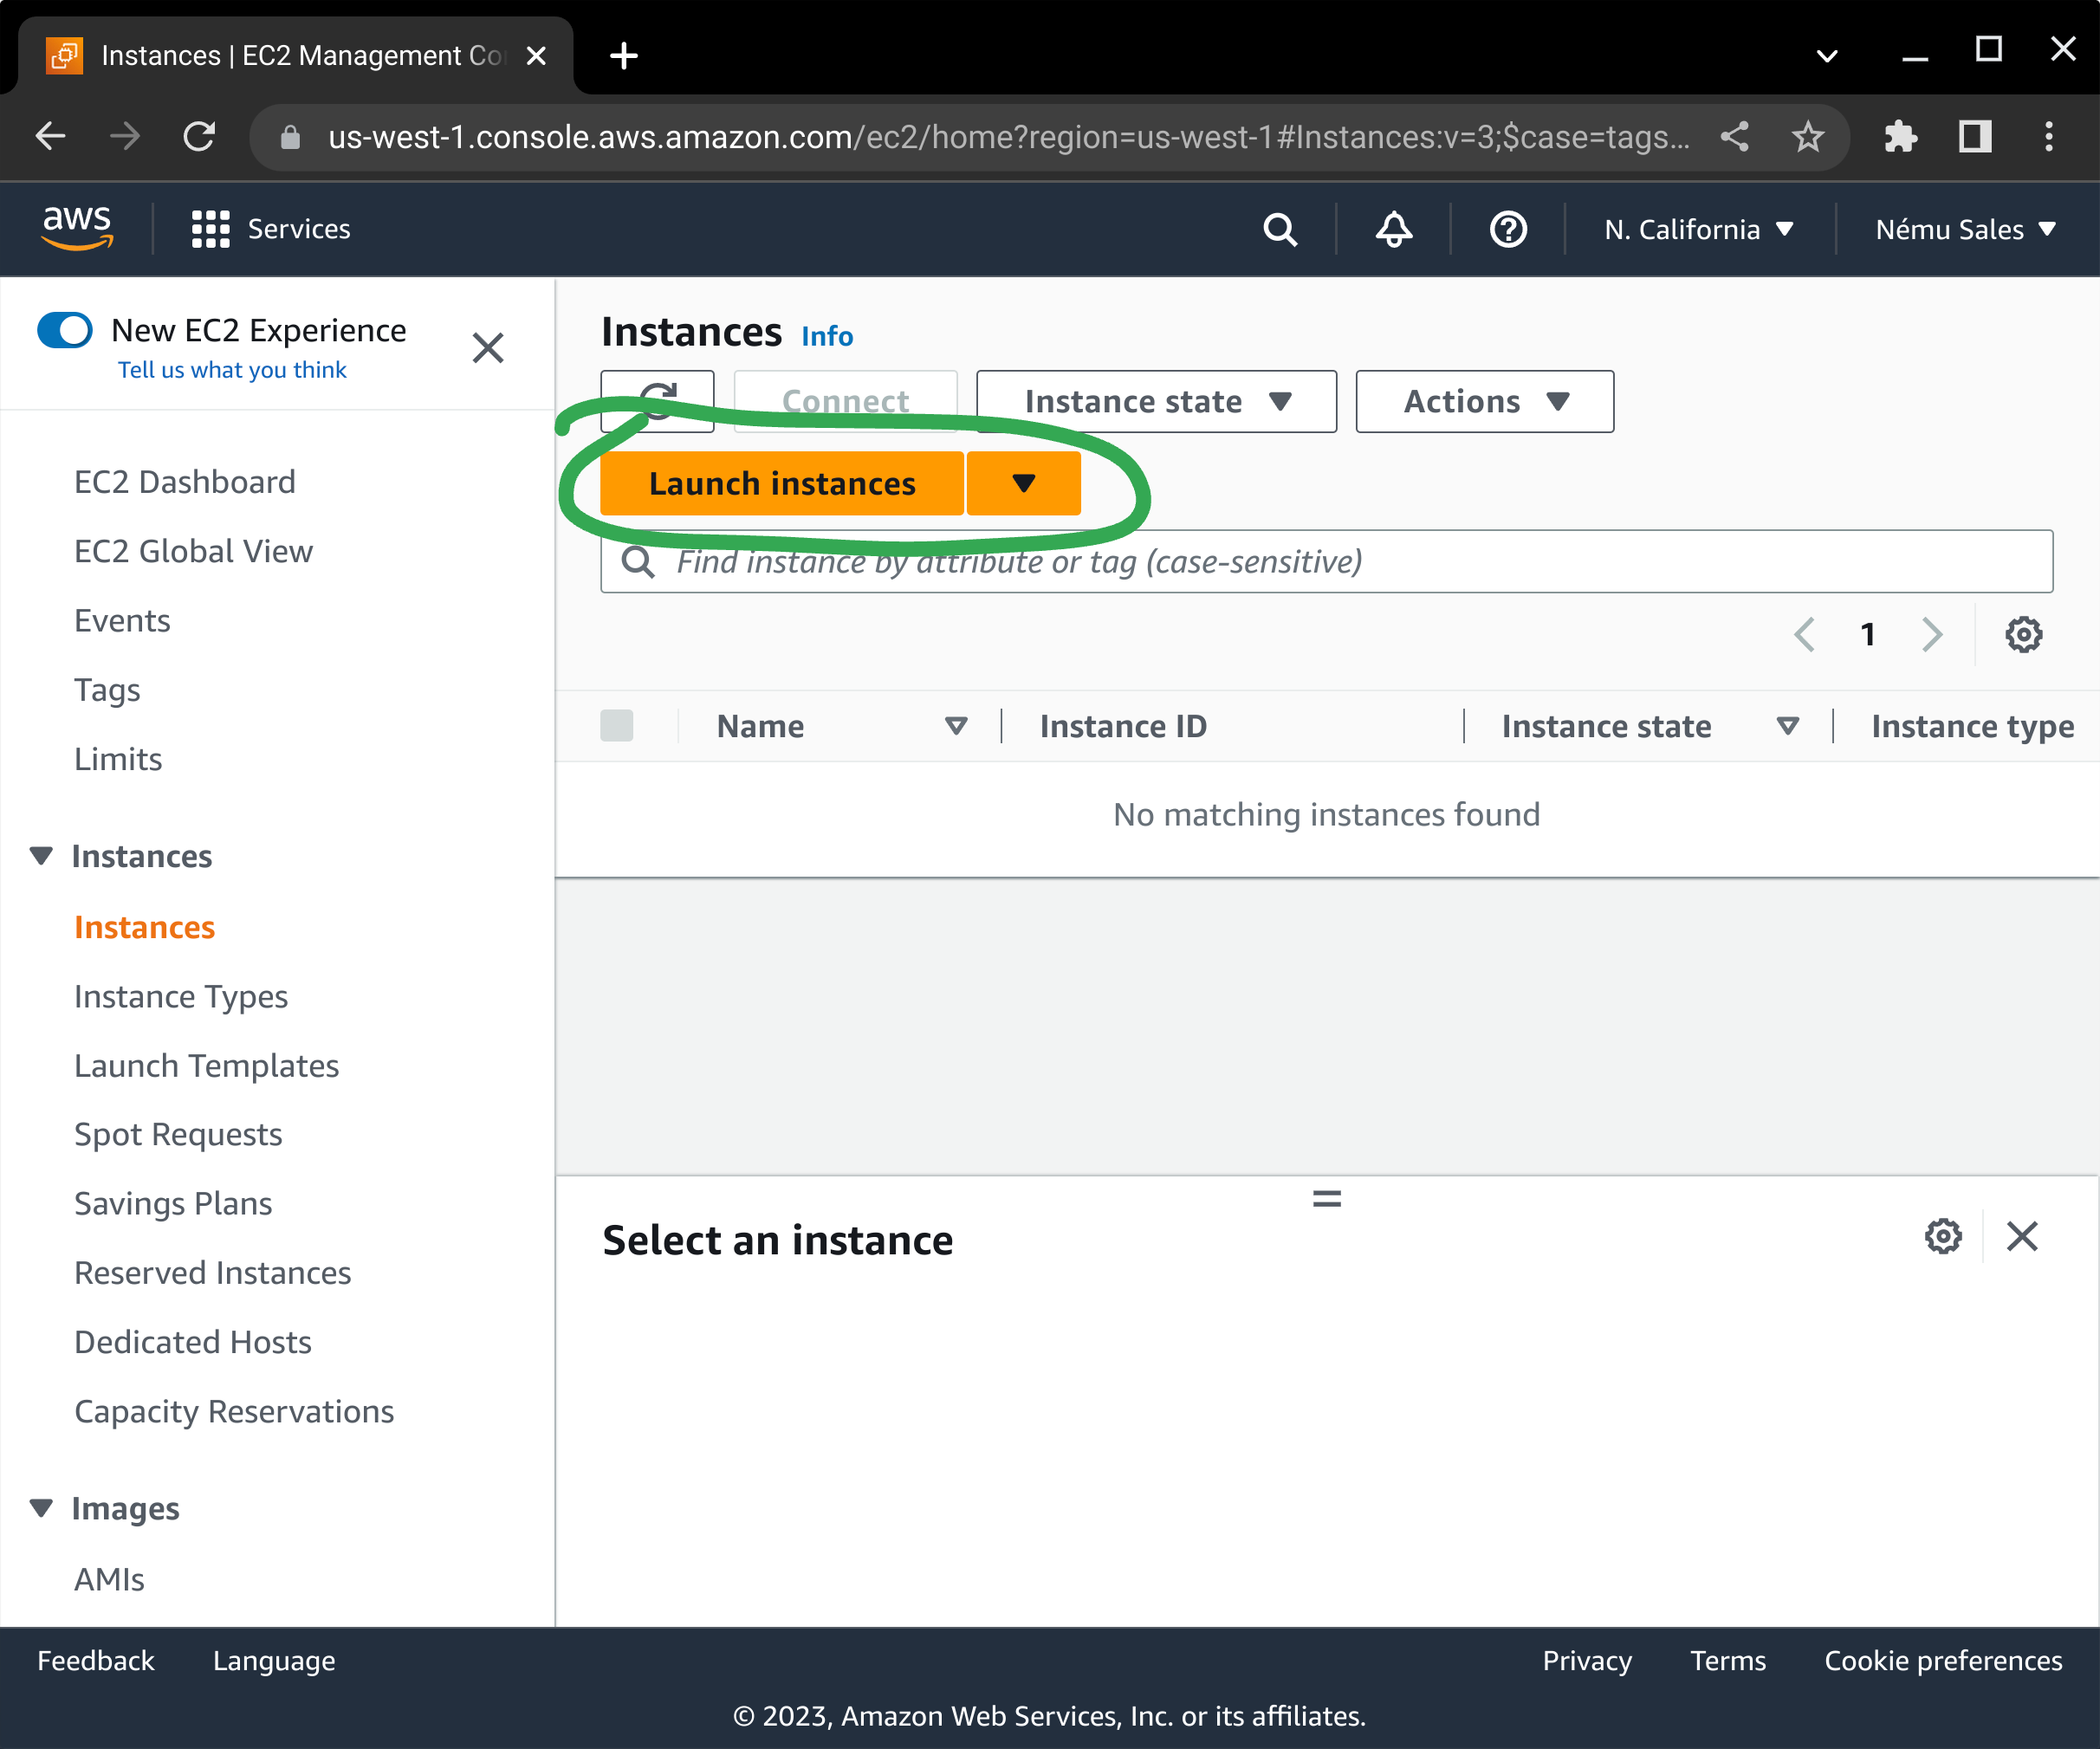
If you are just testing our AMI, or you use the AWS console to launch new EC2 instances, you'll find this process familiar. To start, browse to your EC2 console and click on either one of the Launch Instance buttons.
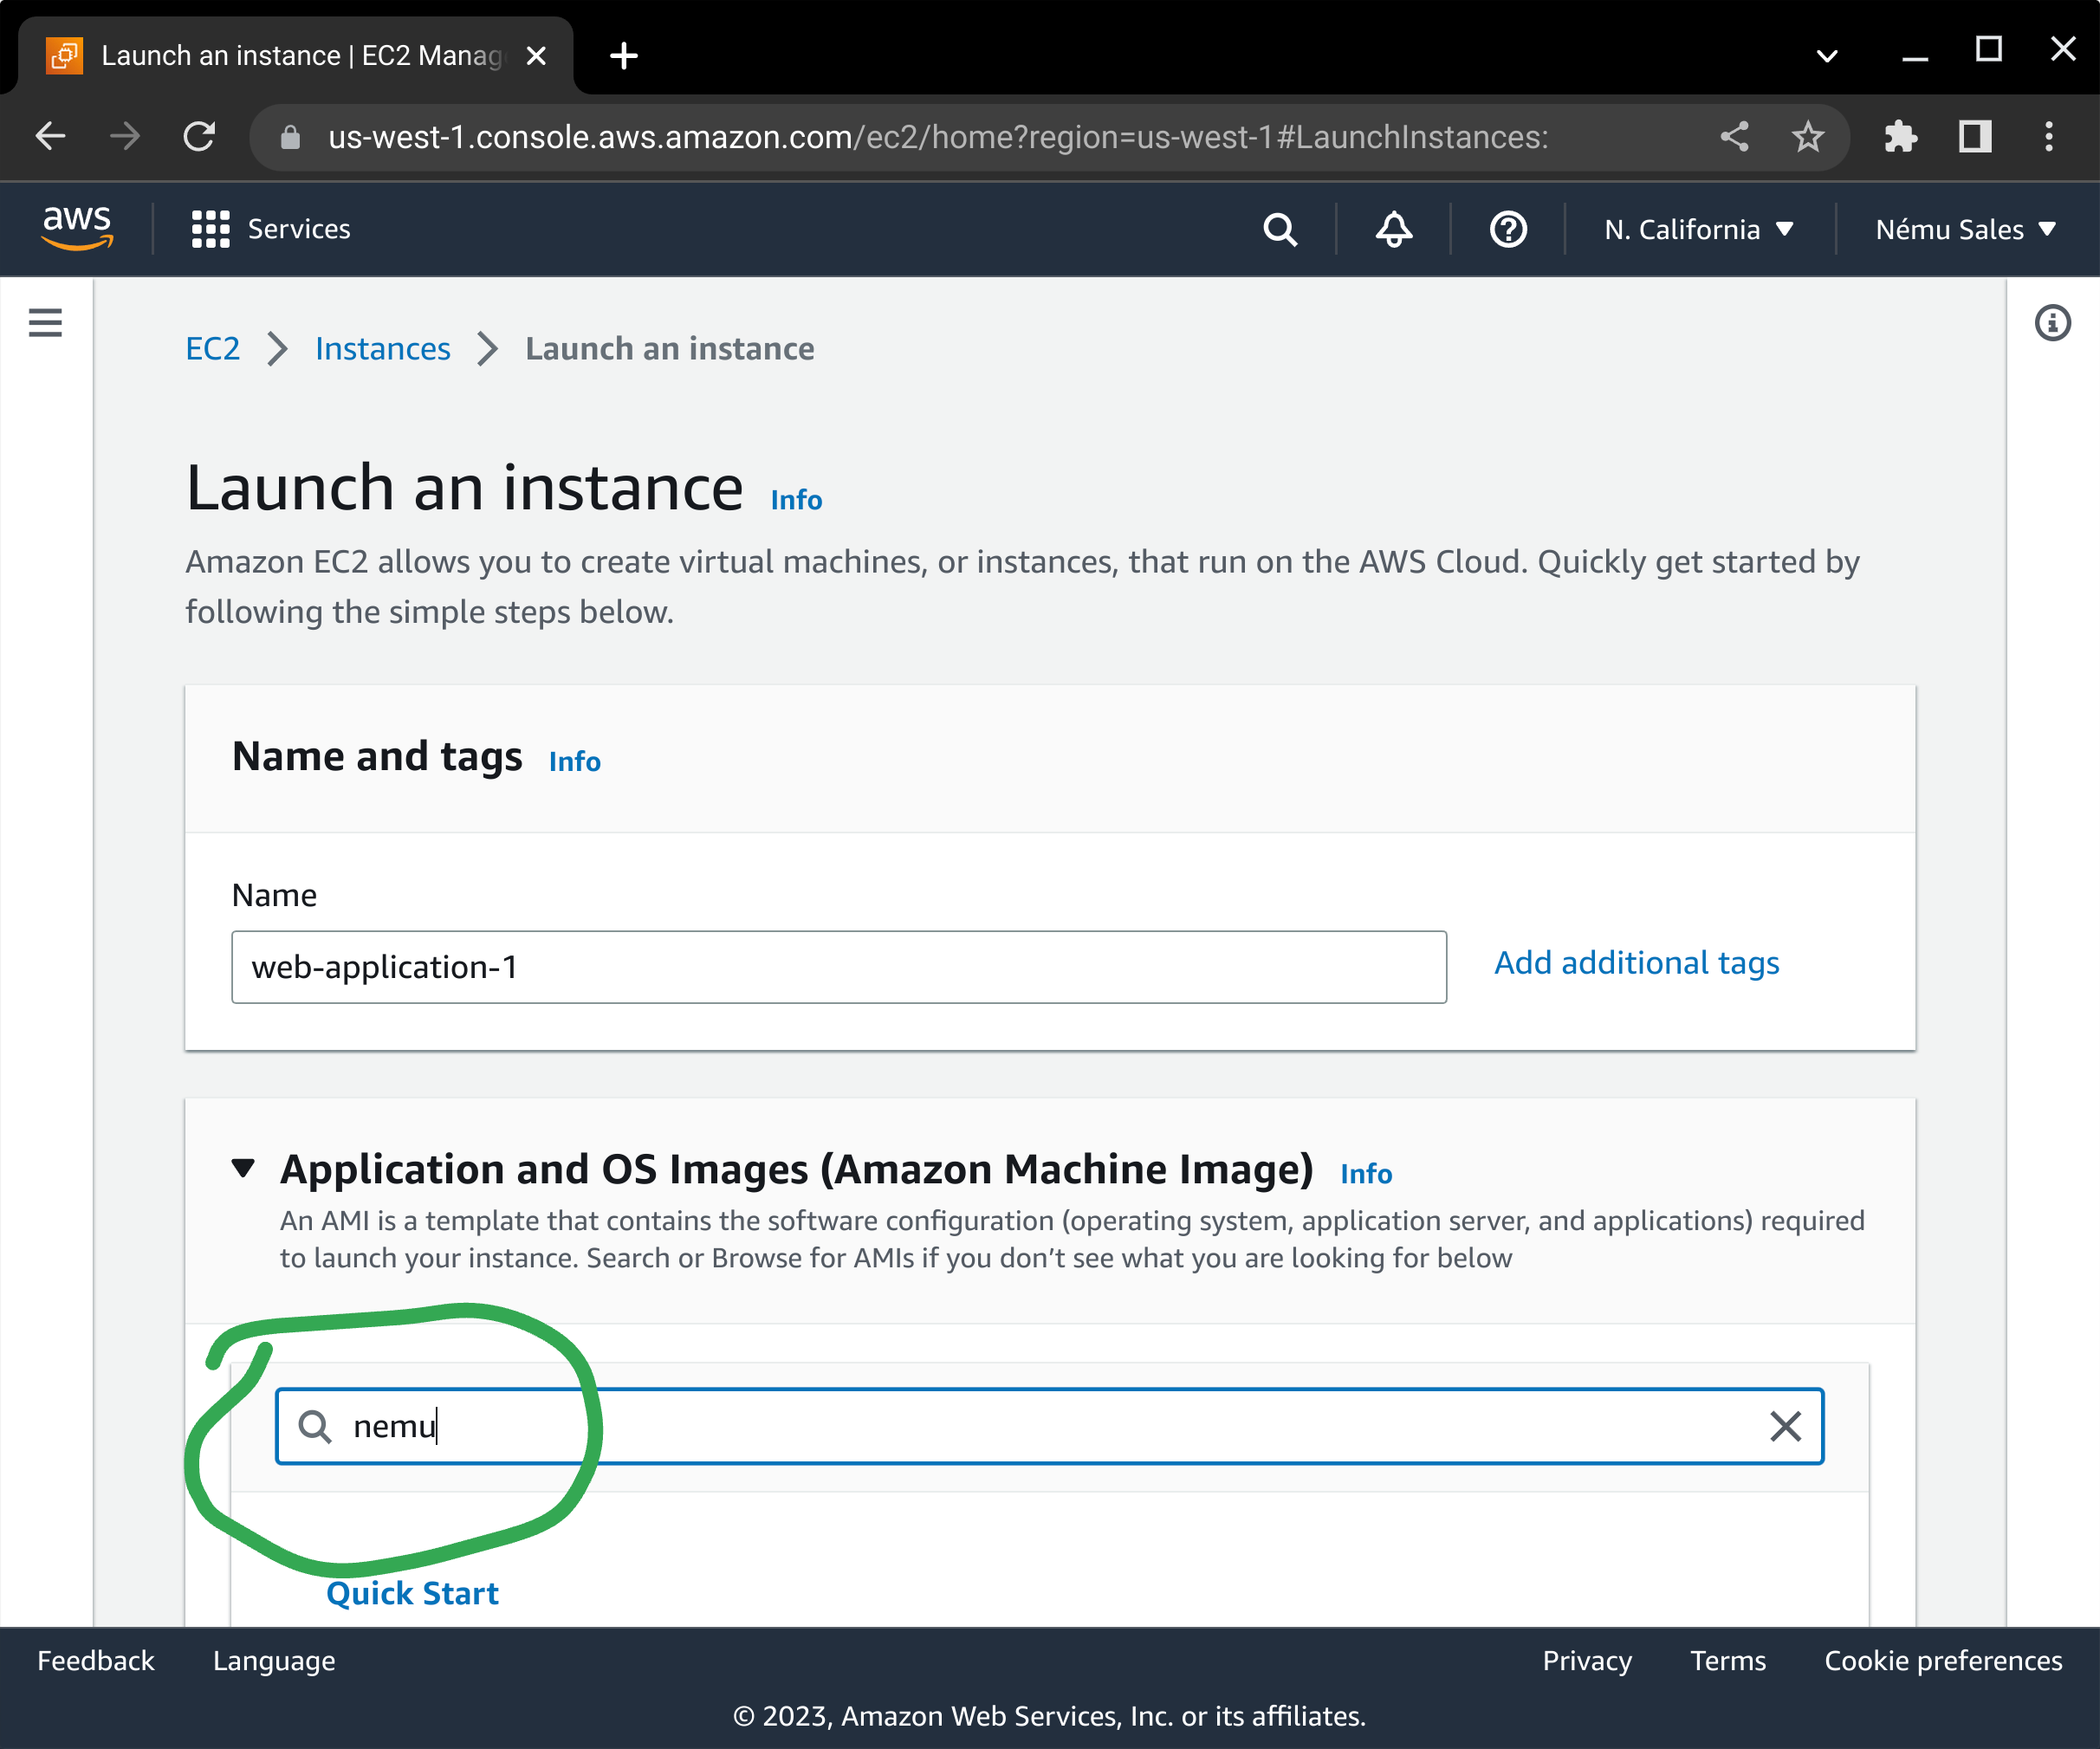
Next, click on AWS Marketplace in the left-hand menu and enter "nemu" in the search box, and press enter.
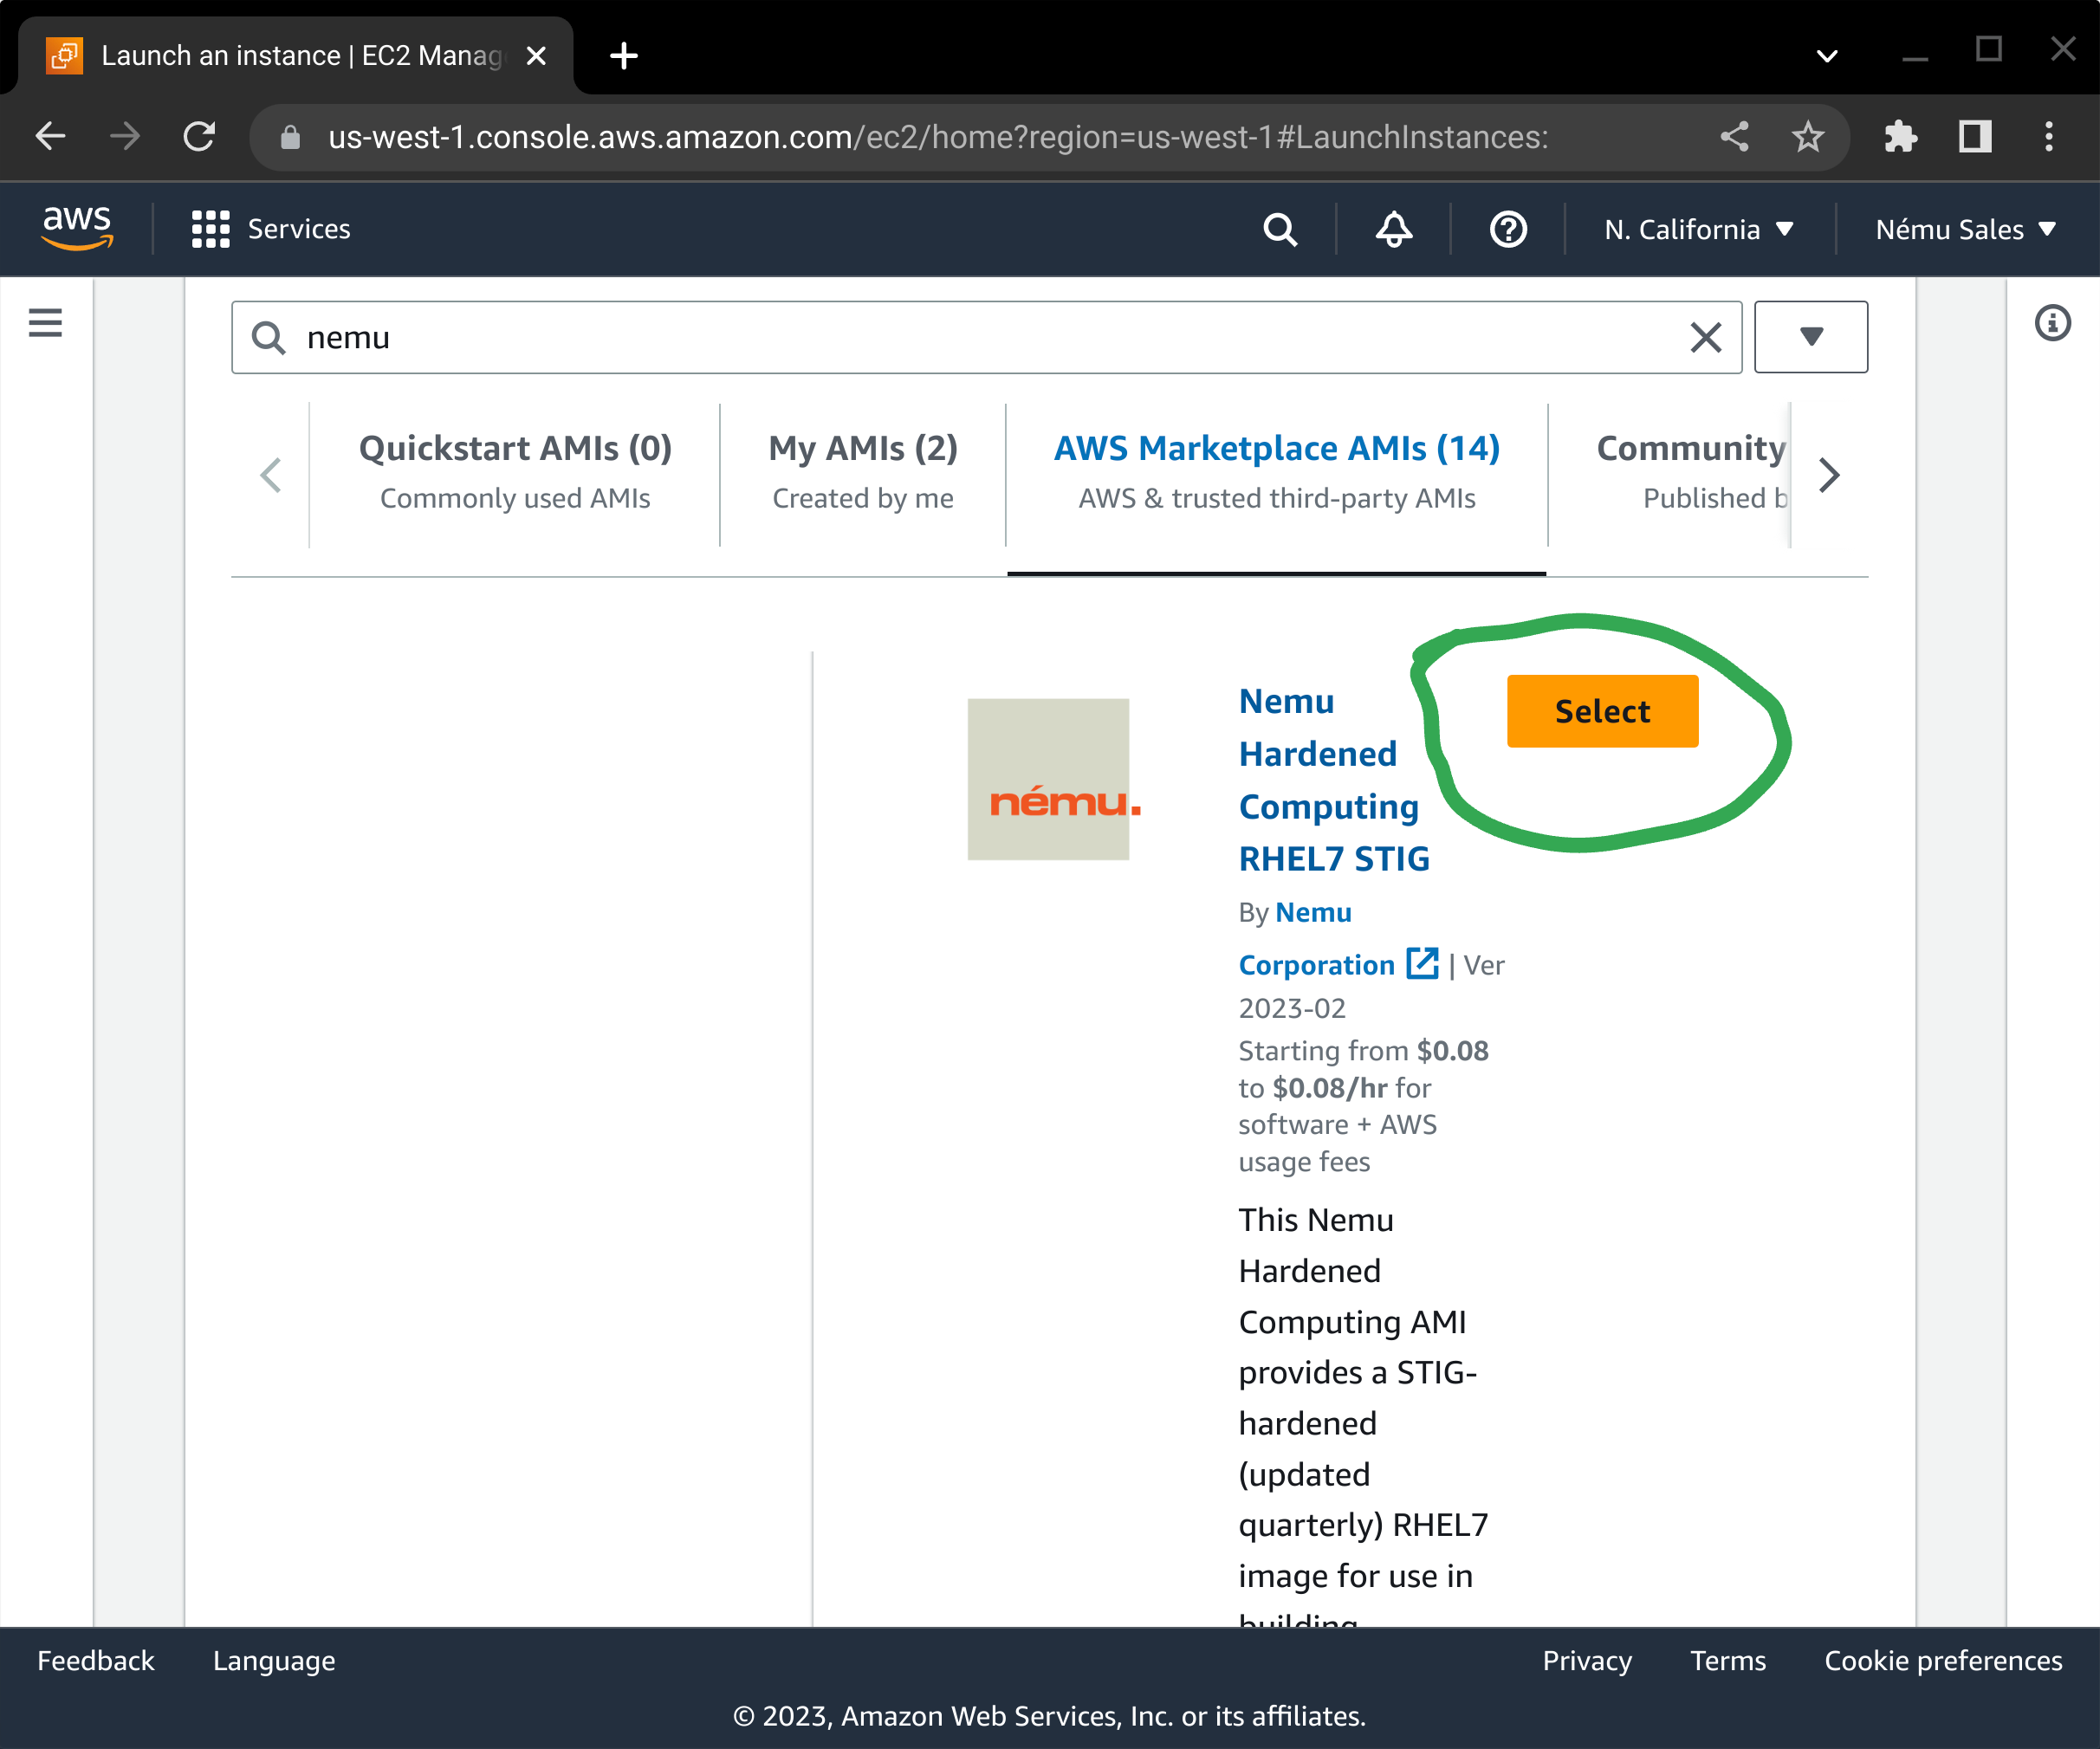
From the available Linux AMIs that are returned in the search results, scroll down and press the corresponding Select button.
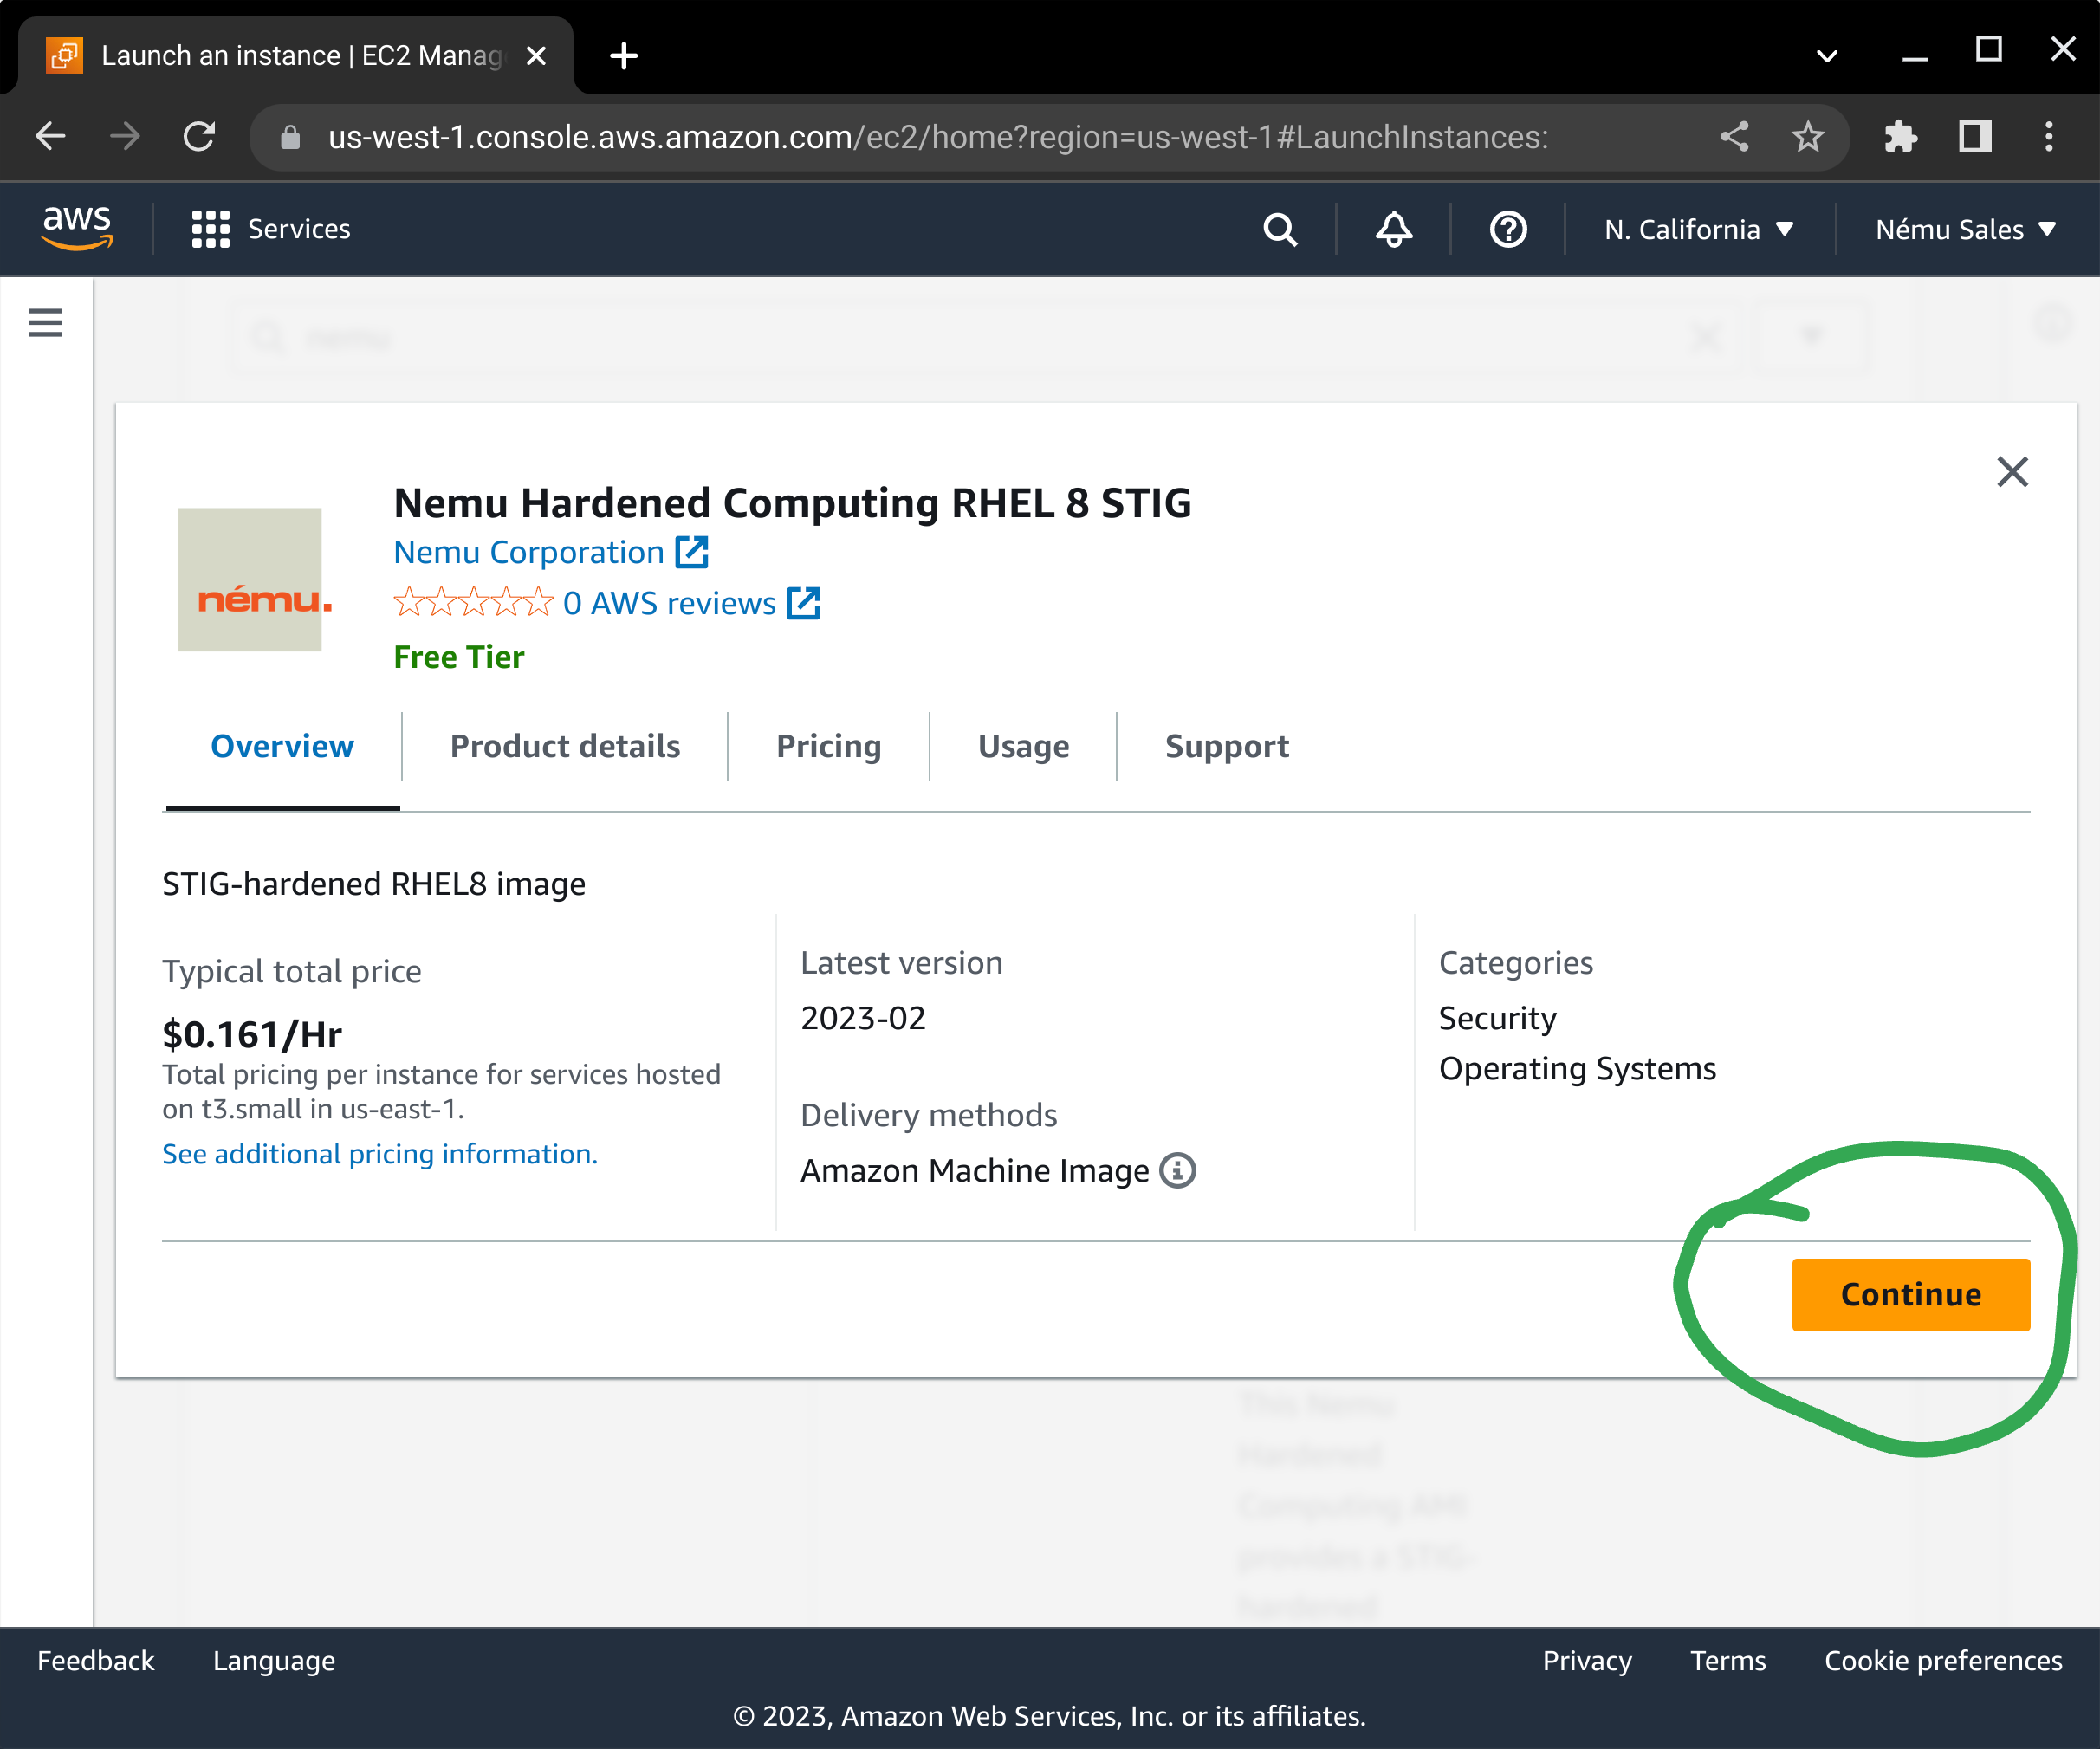
If you have not subscribed to the product yet, a dialog box will pop up asking you to confirm your subscription. Press the Continue button to subscribe to this AMI.
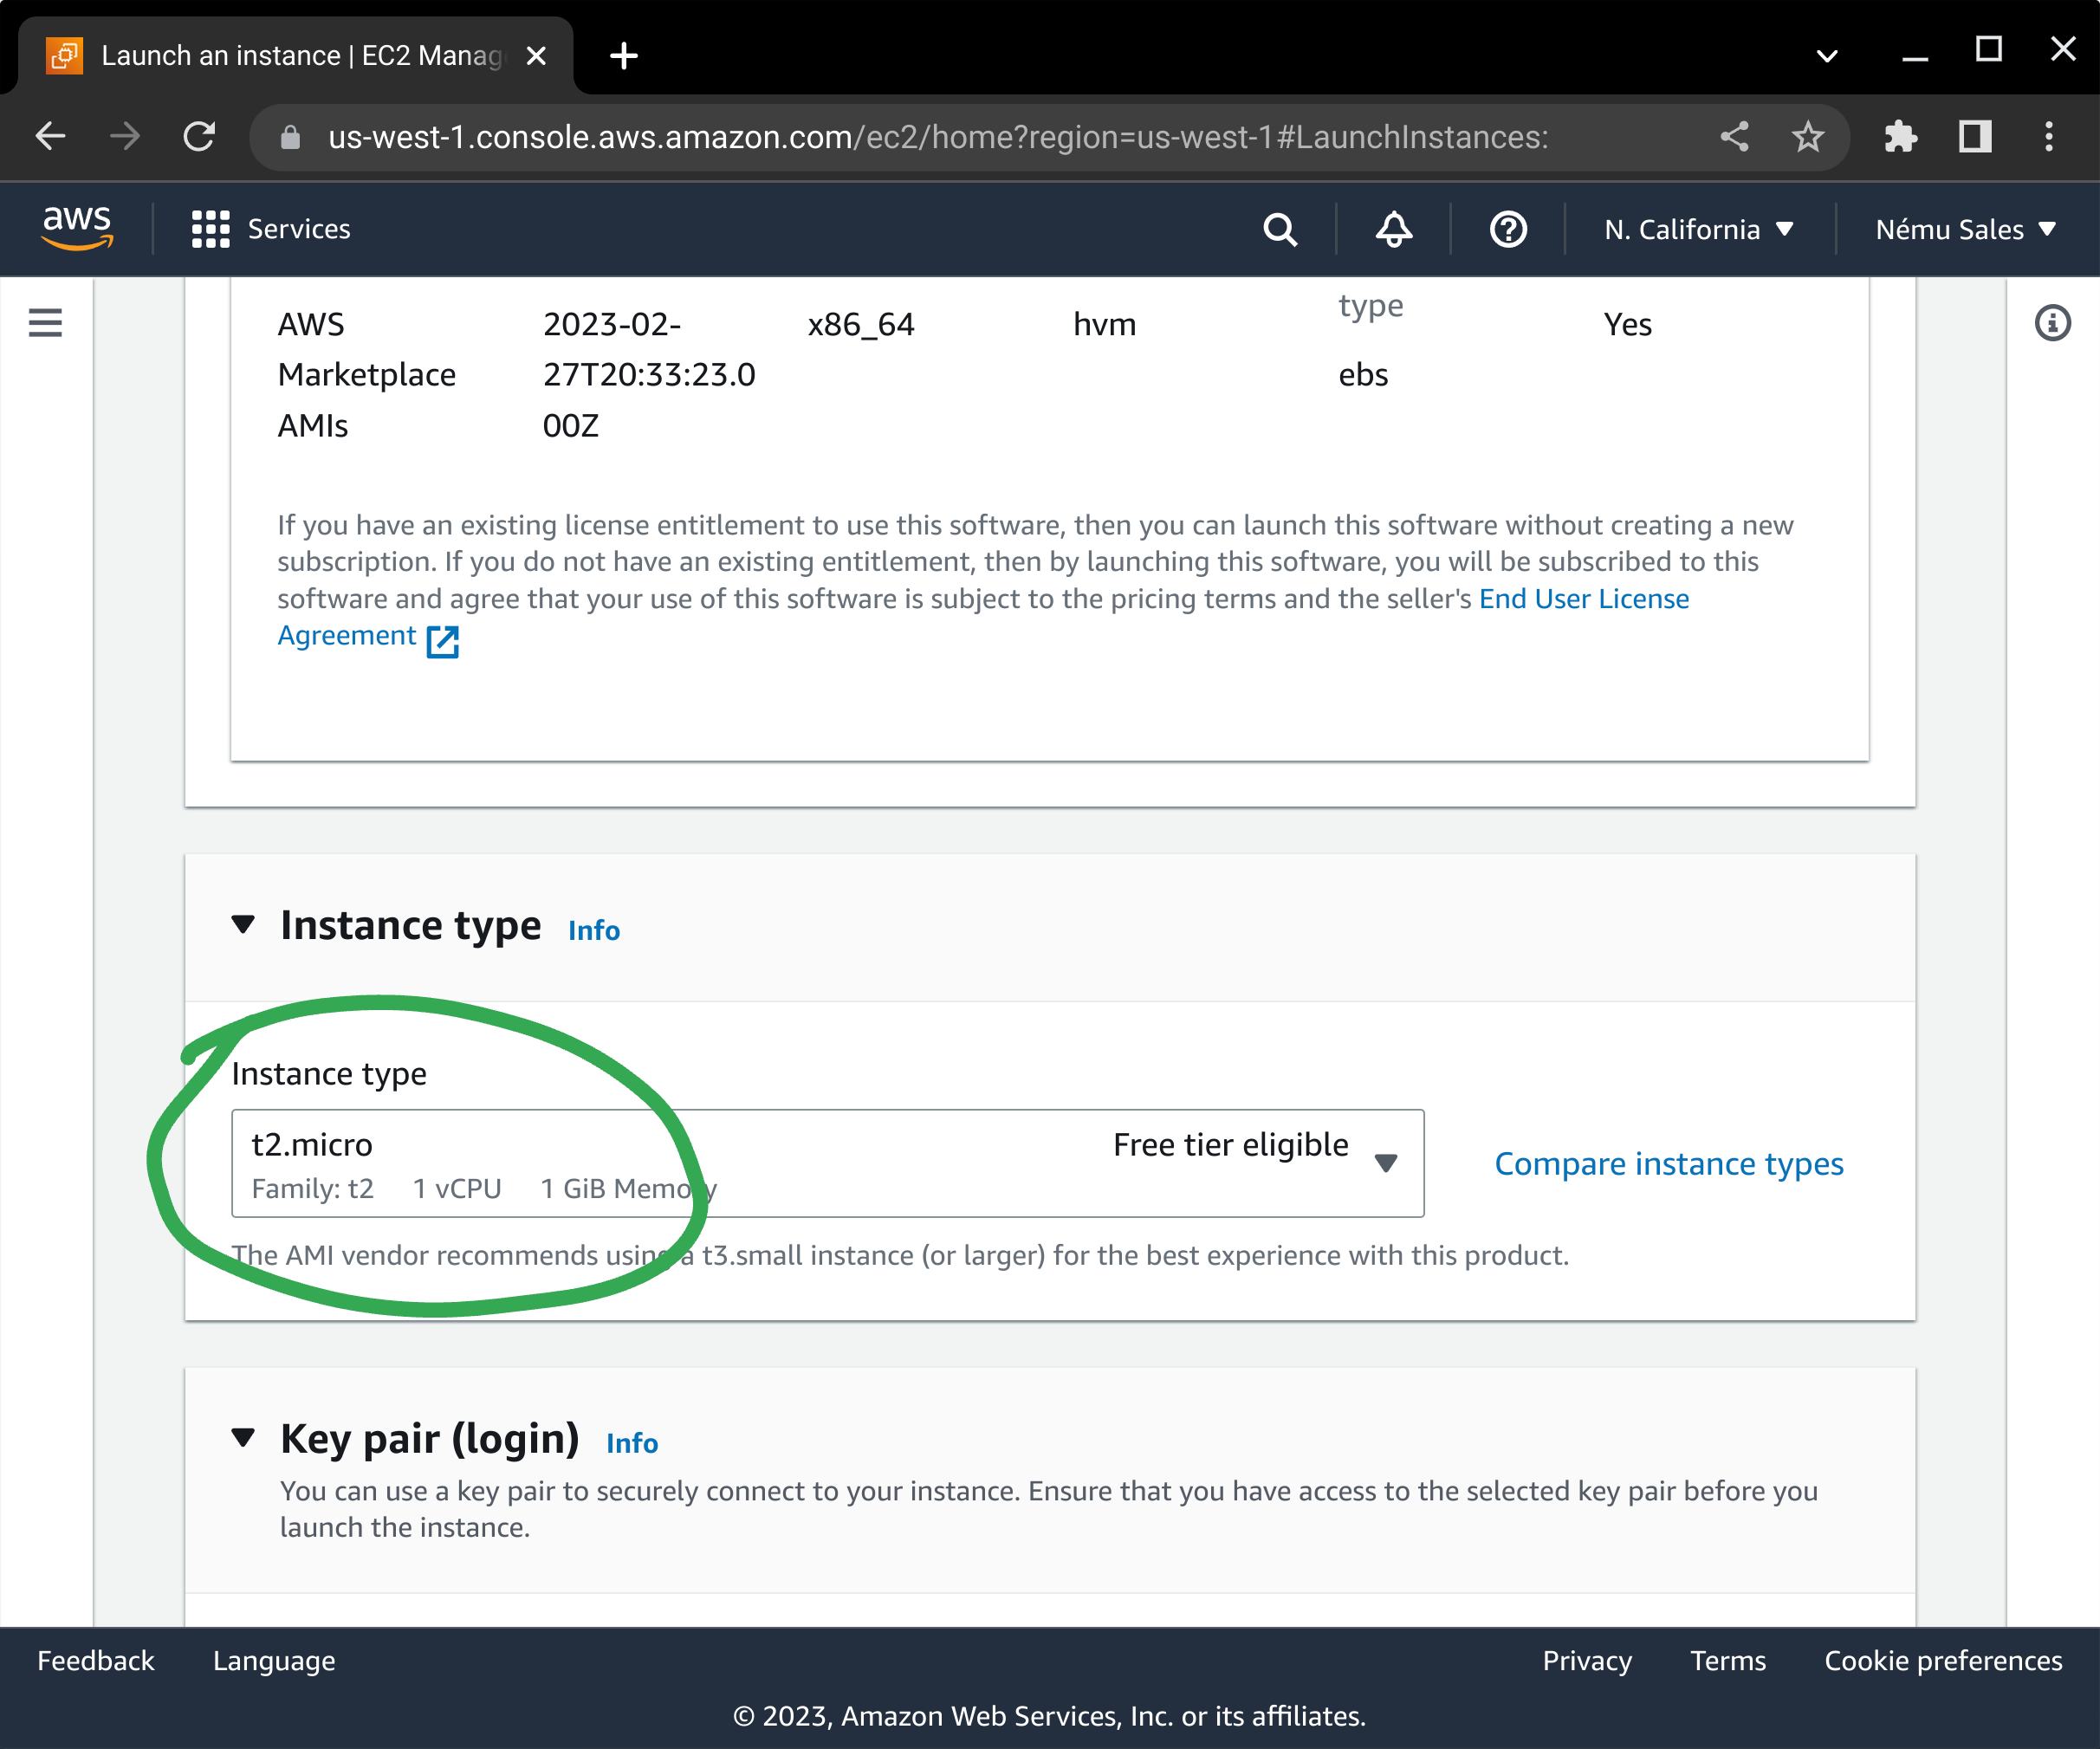
You will need to select your instance type next. This works the same way as any other EC2 instance.
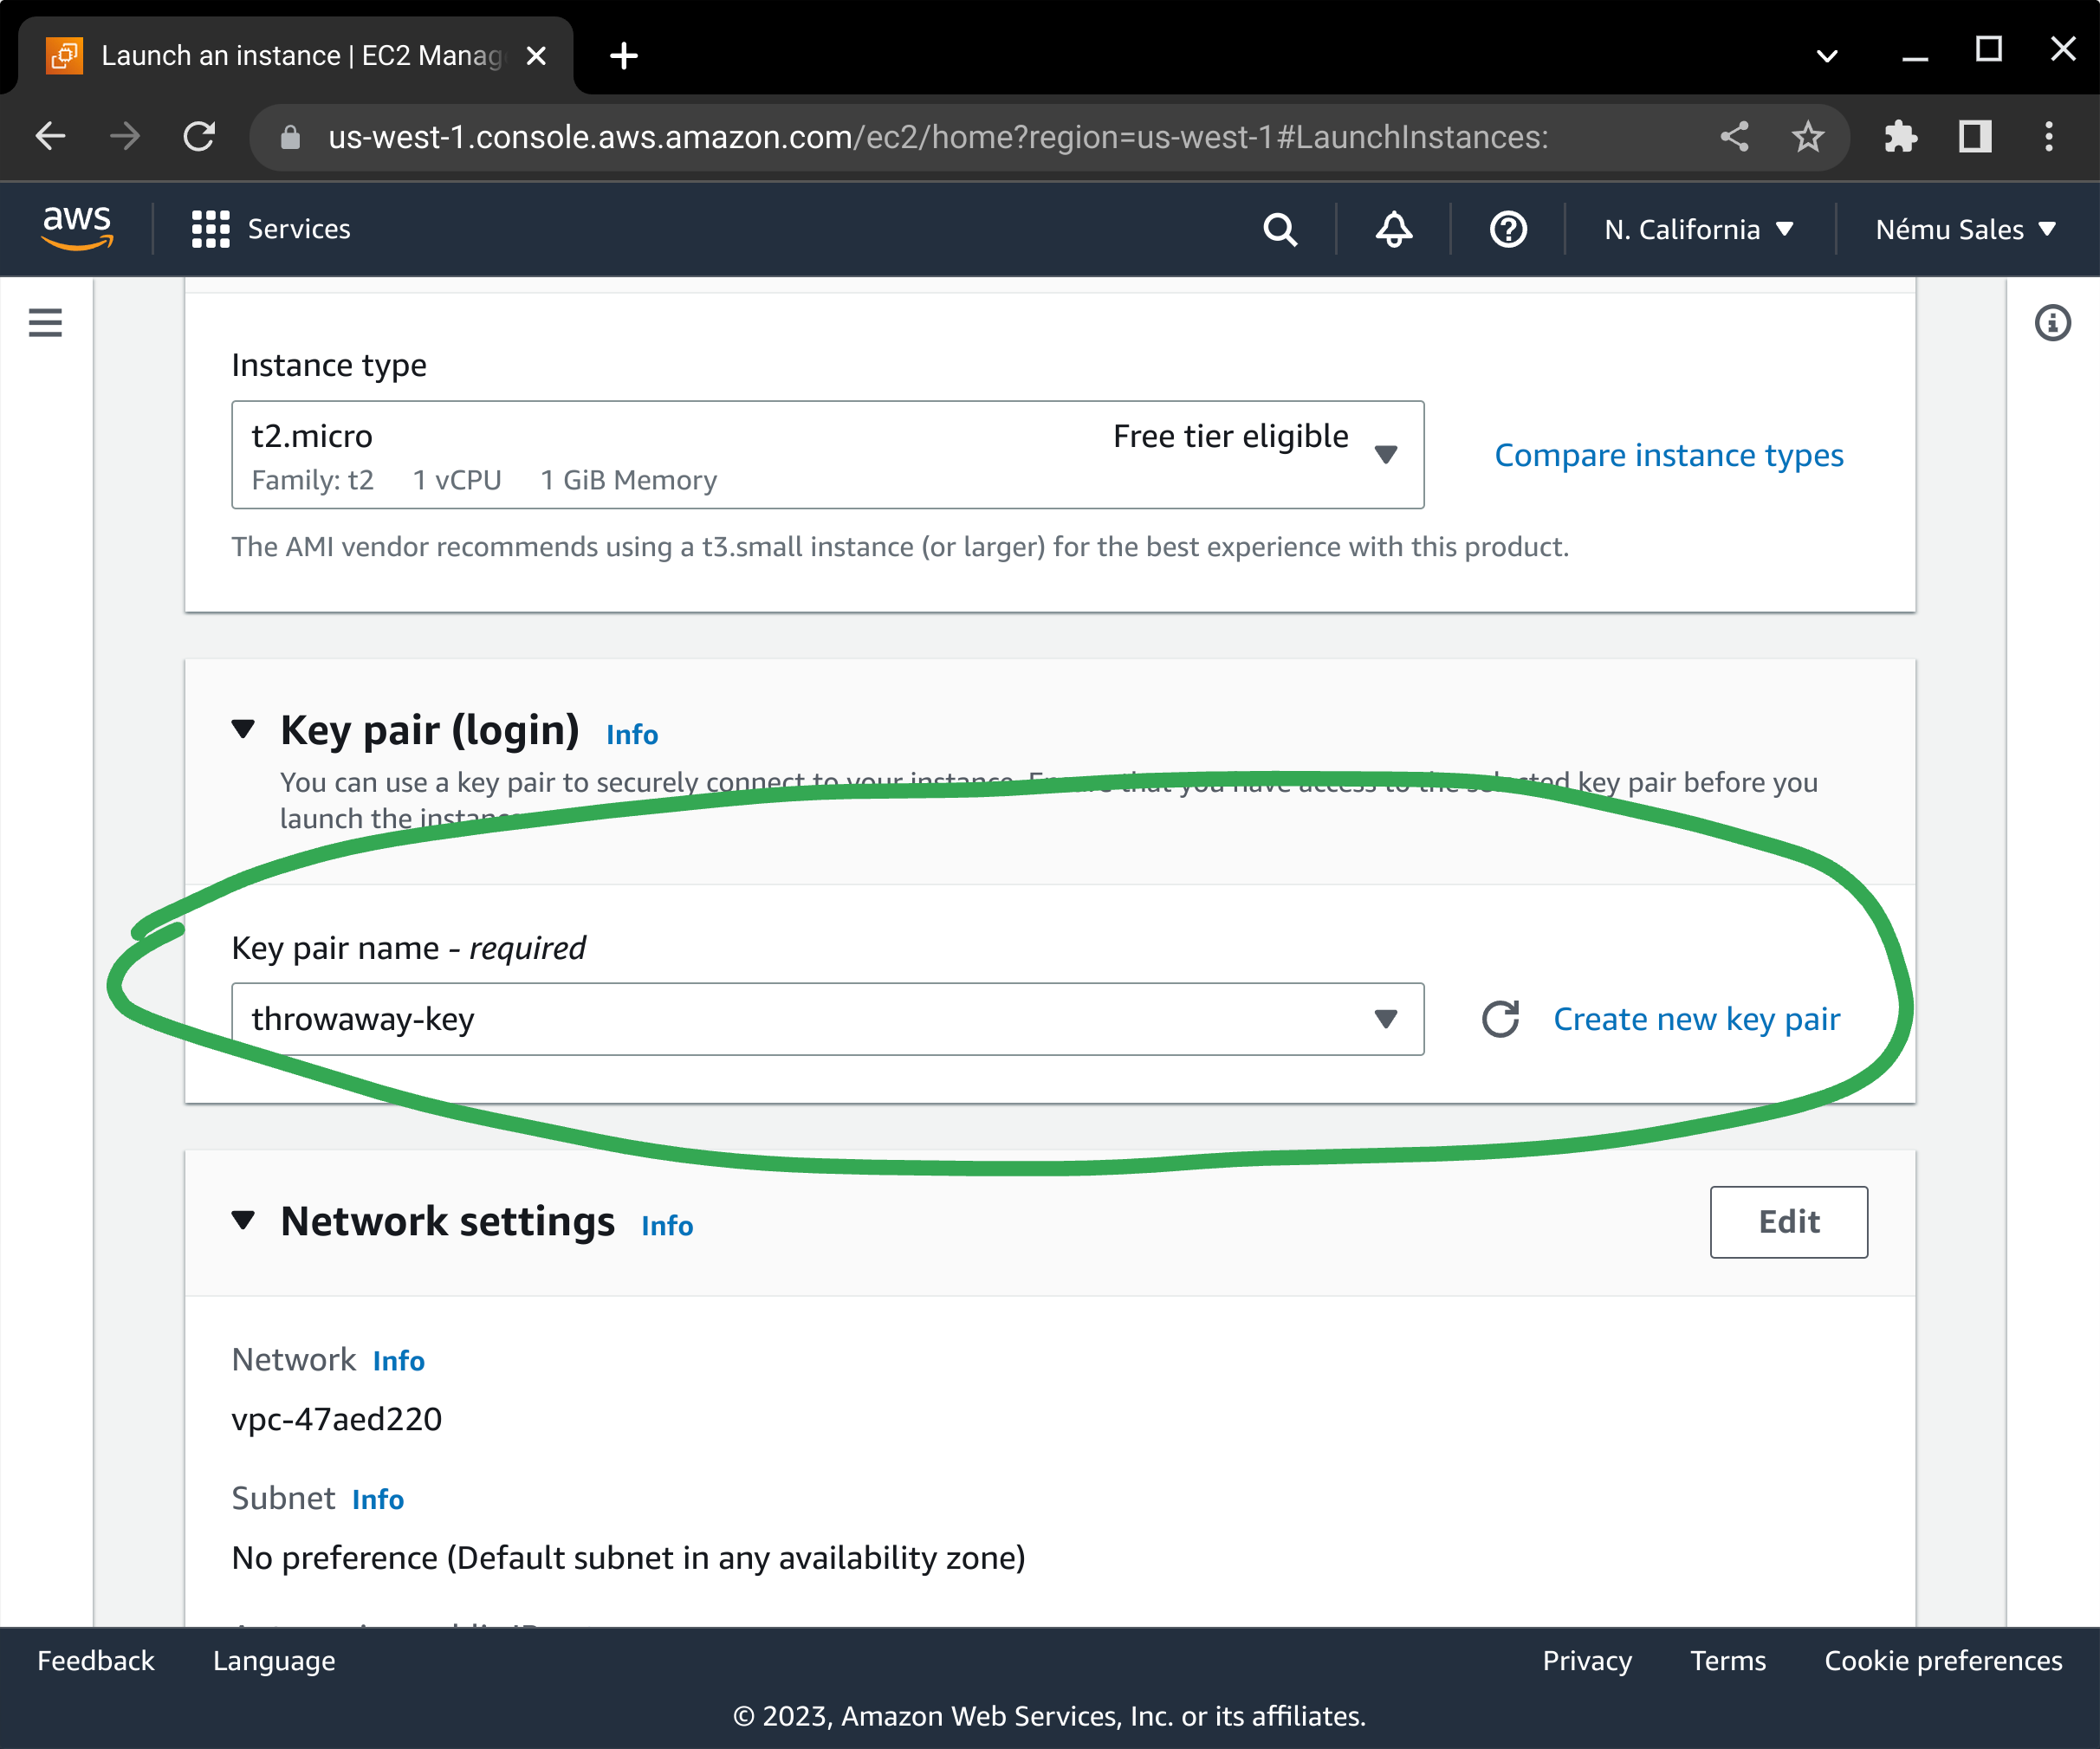
Select your server's SSH keypair, or create one if you do not already have one defined.
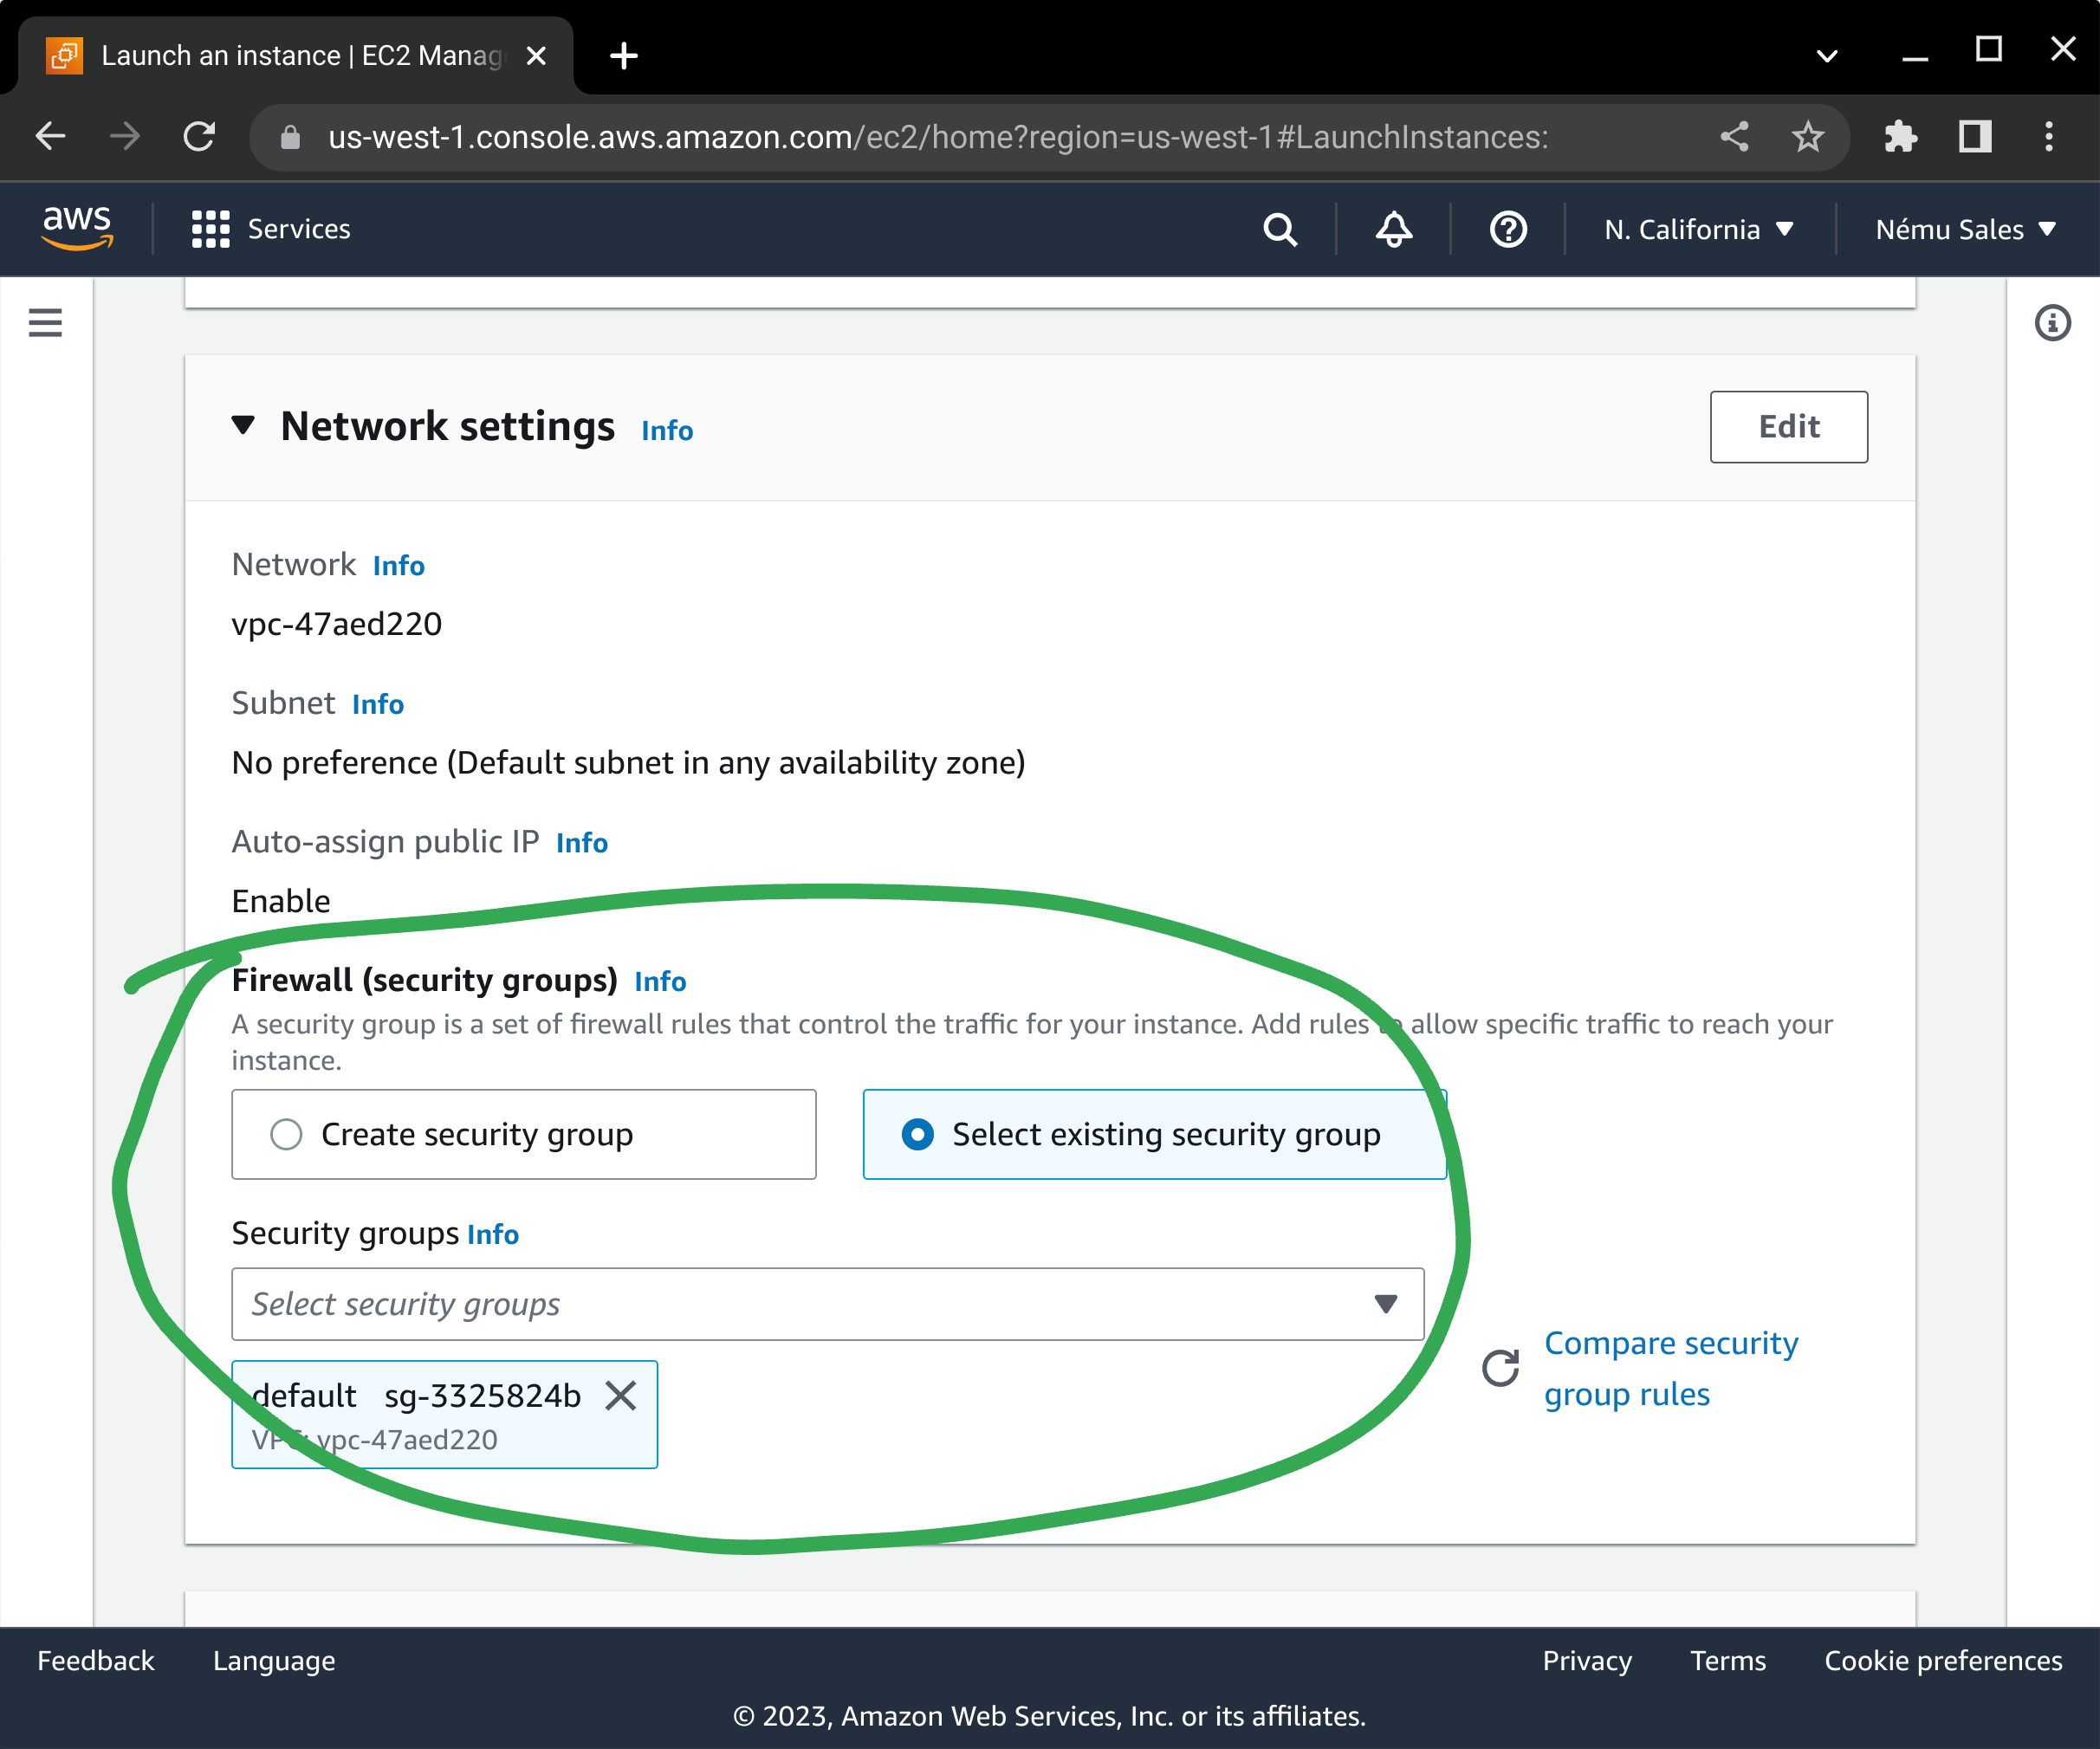
Configure your network placement and security groups in accordance with your application's architecture requirements.
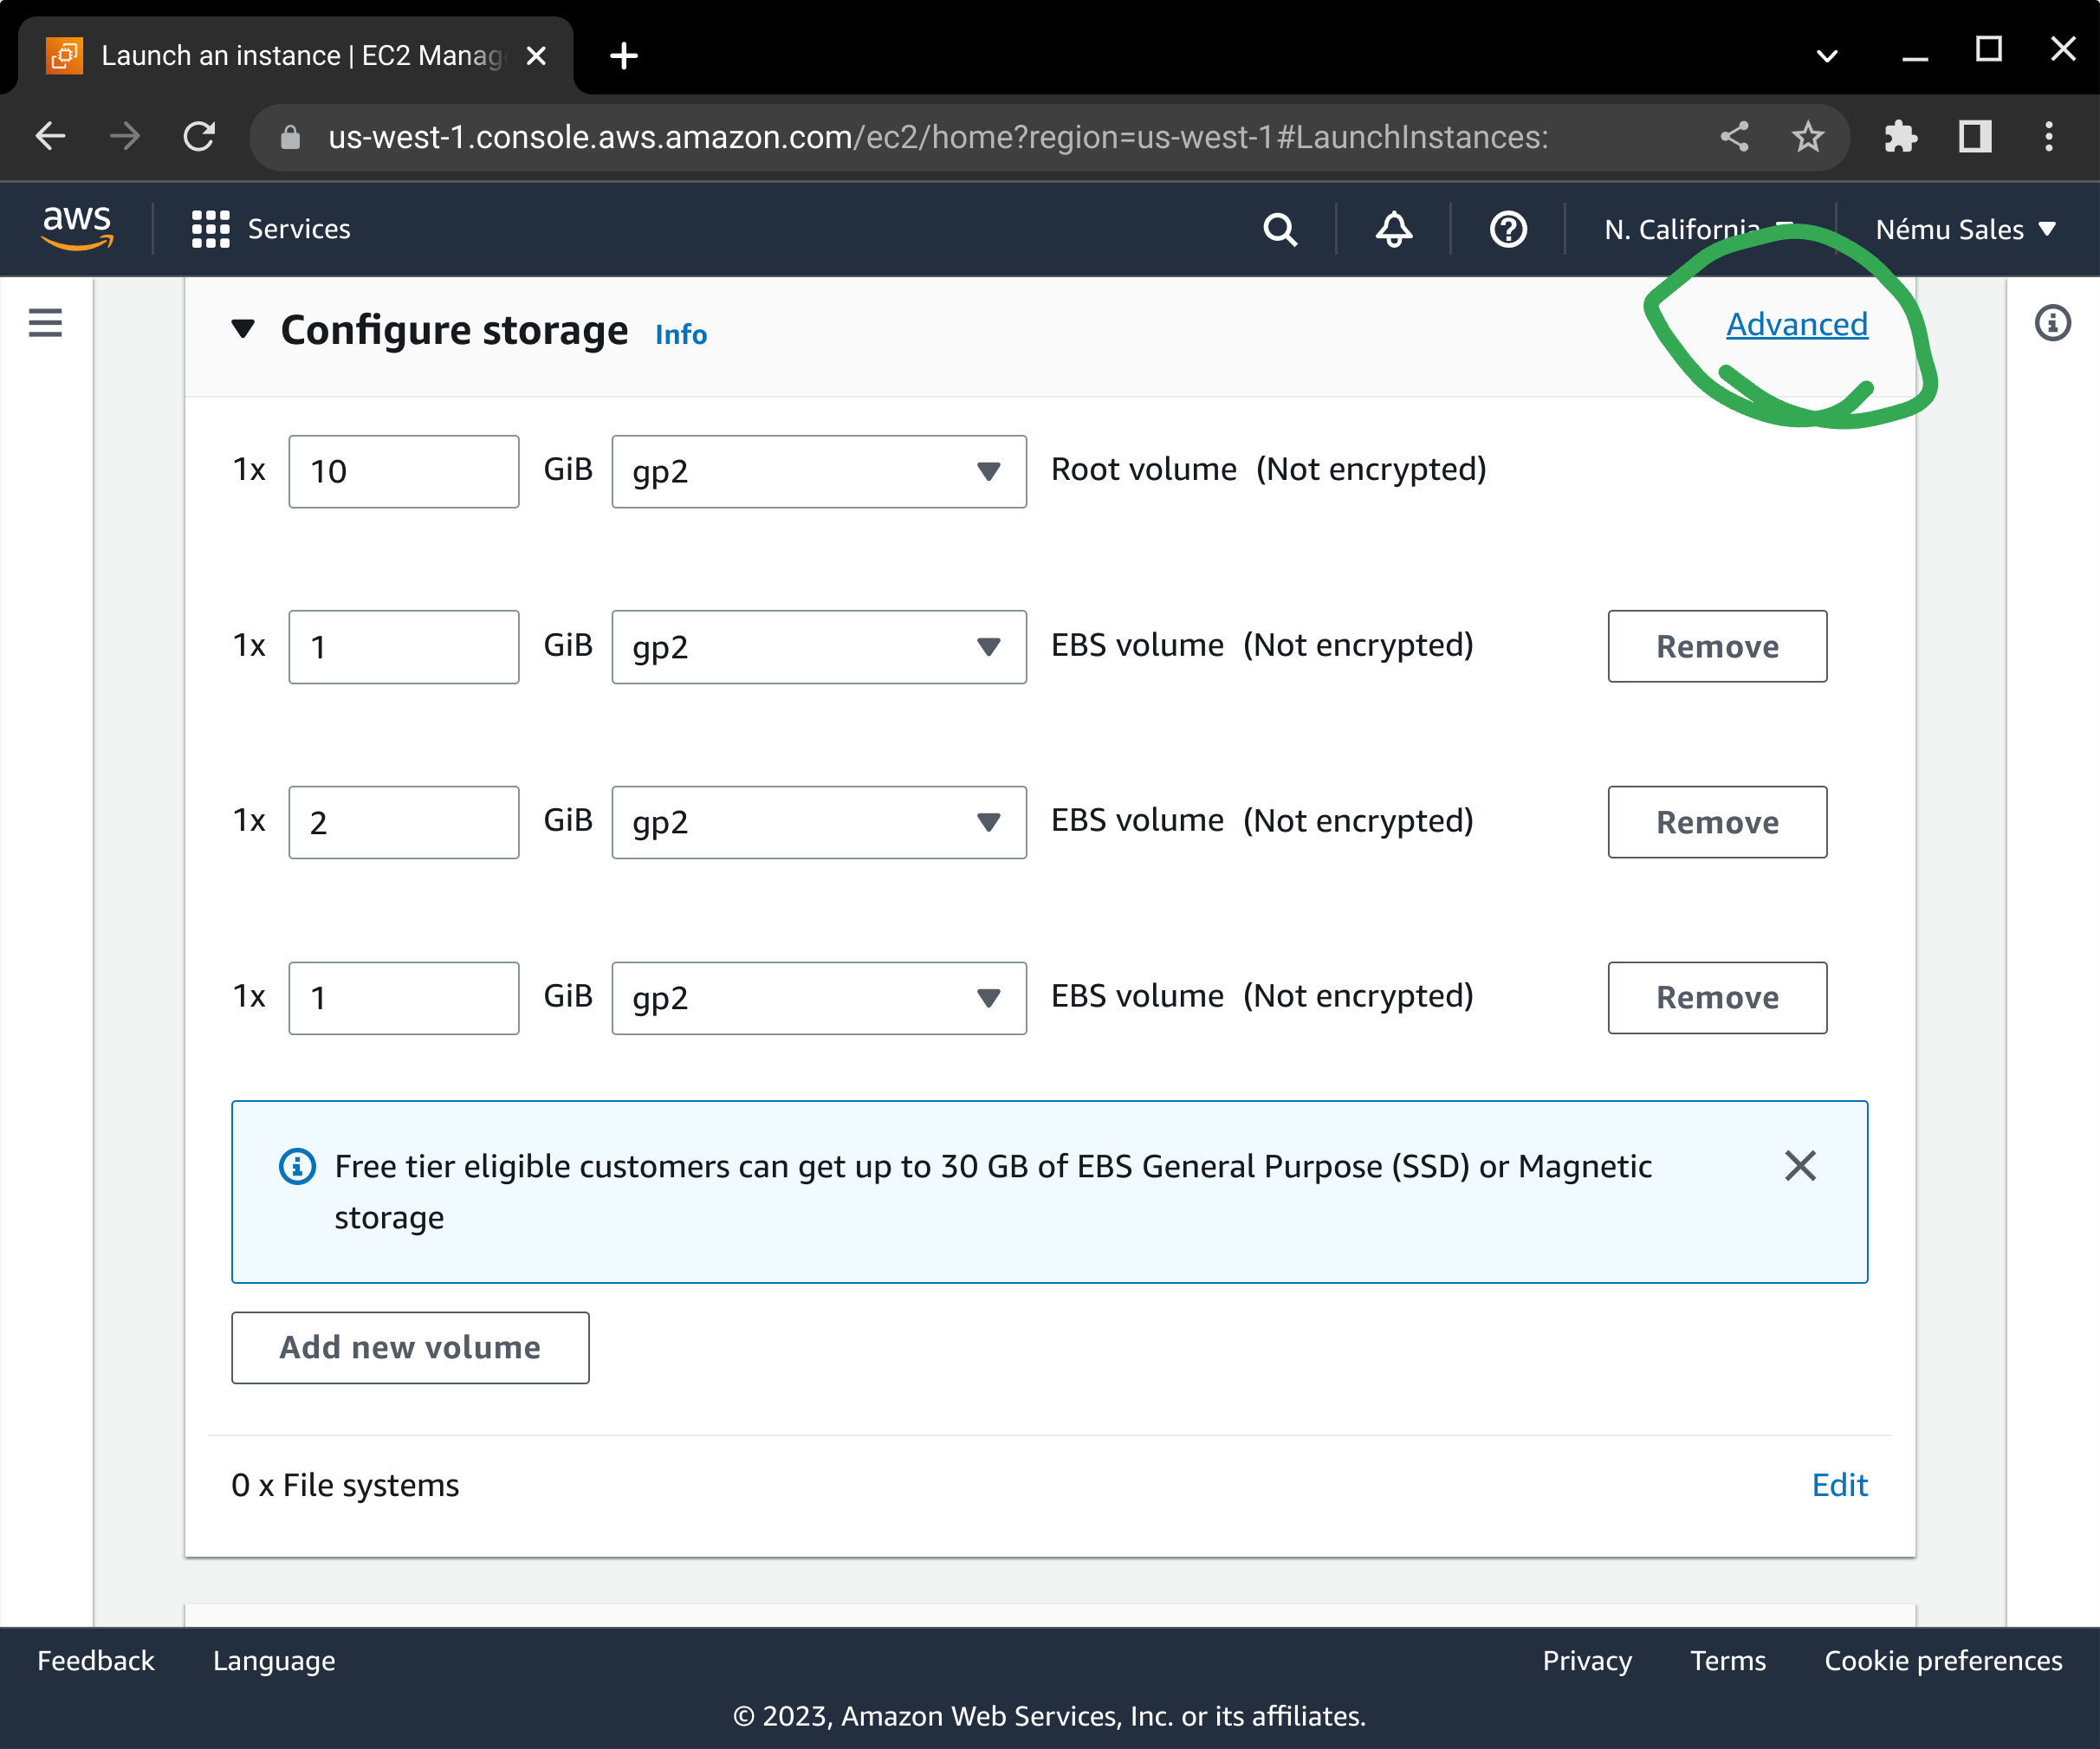
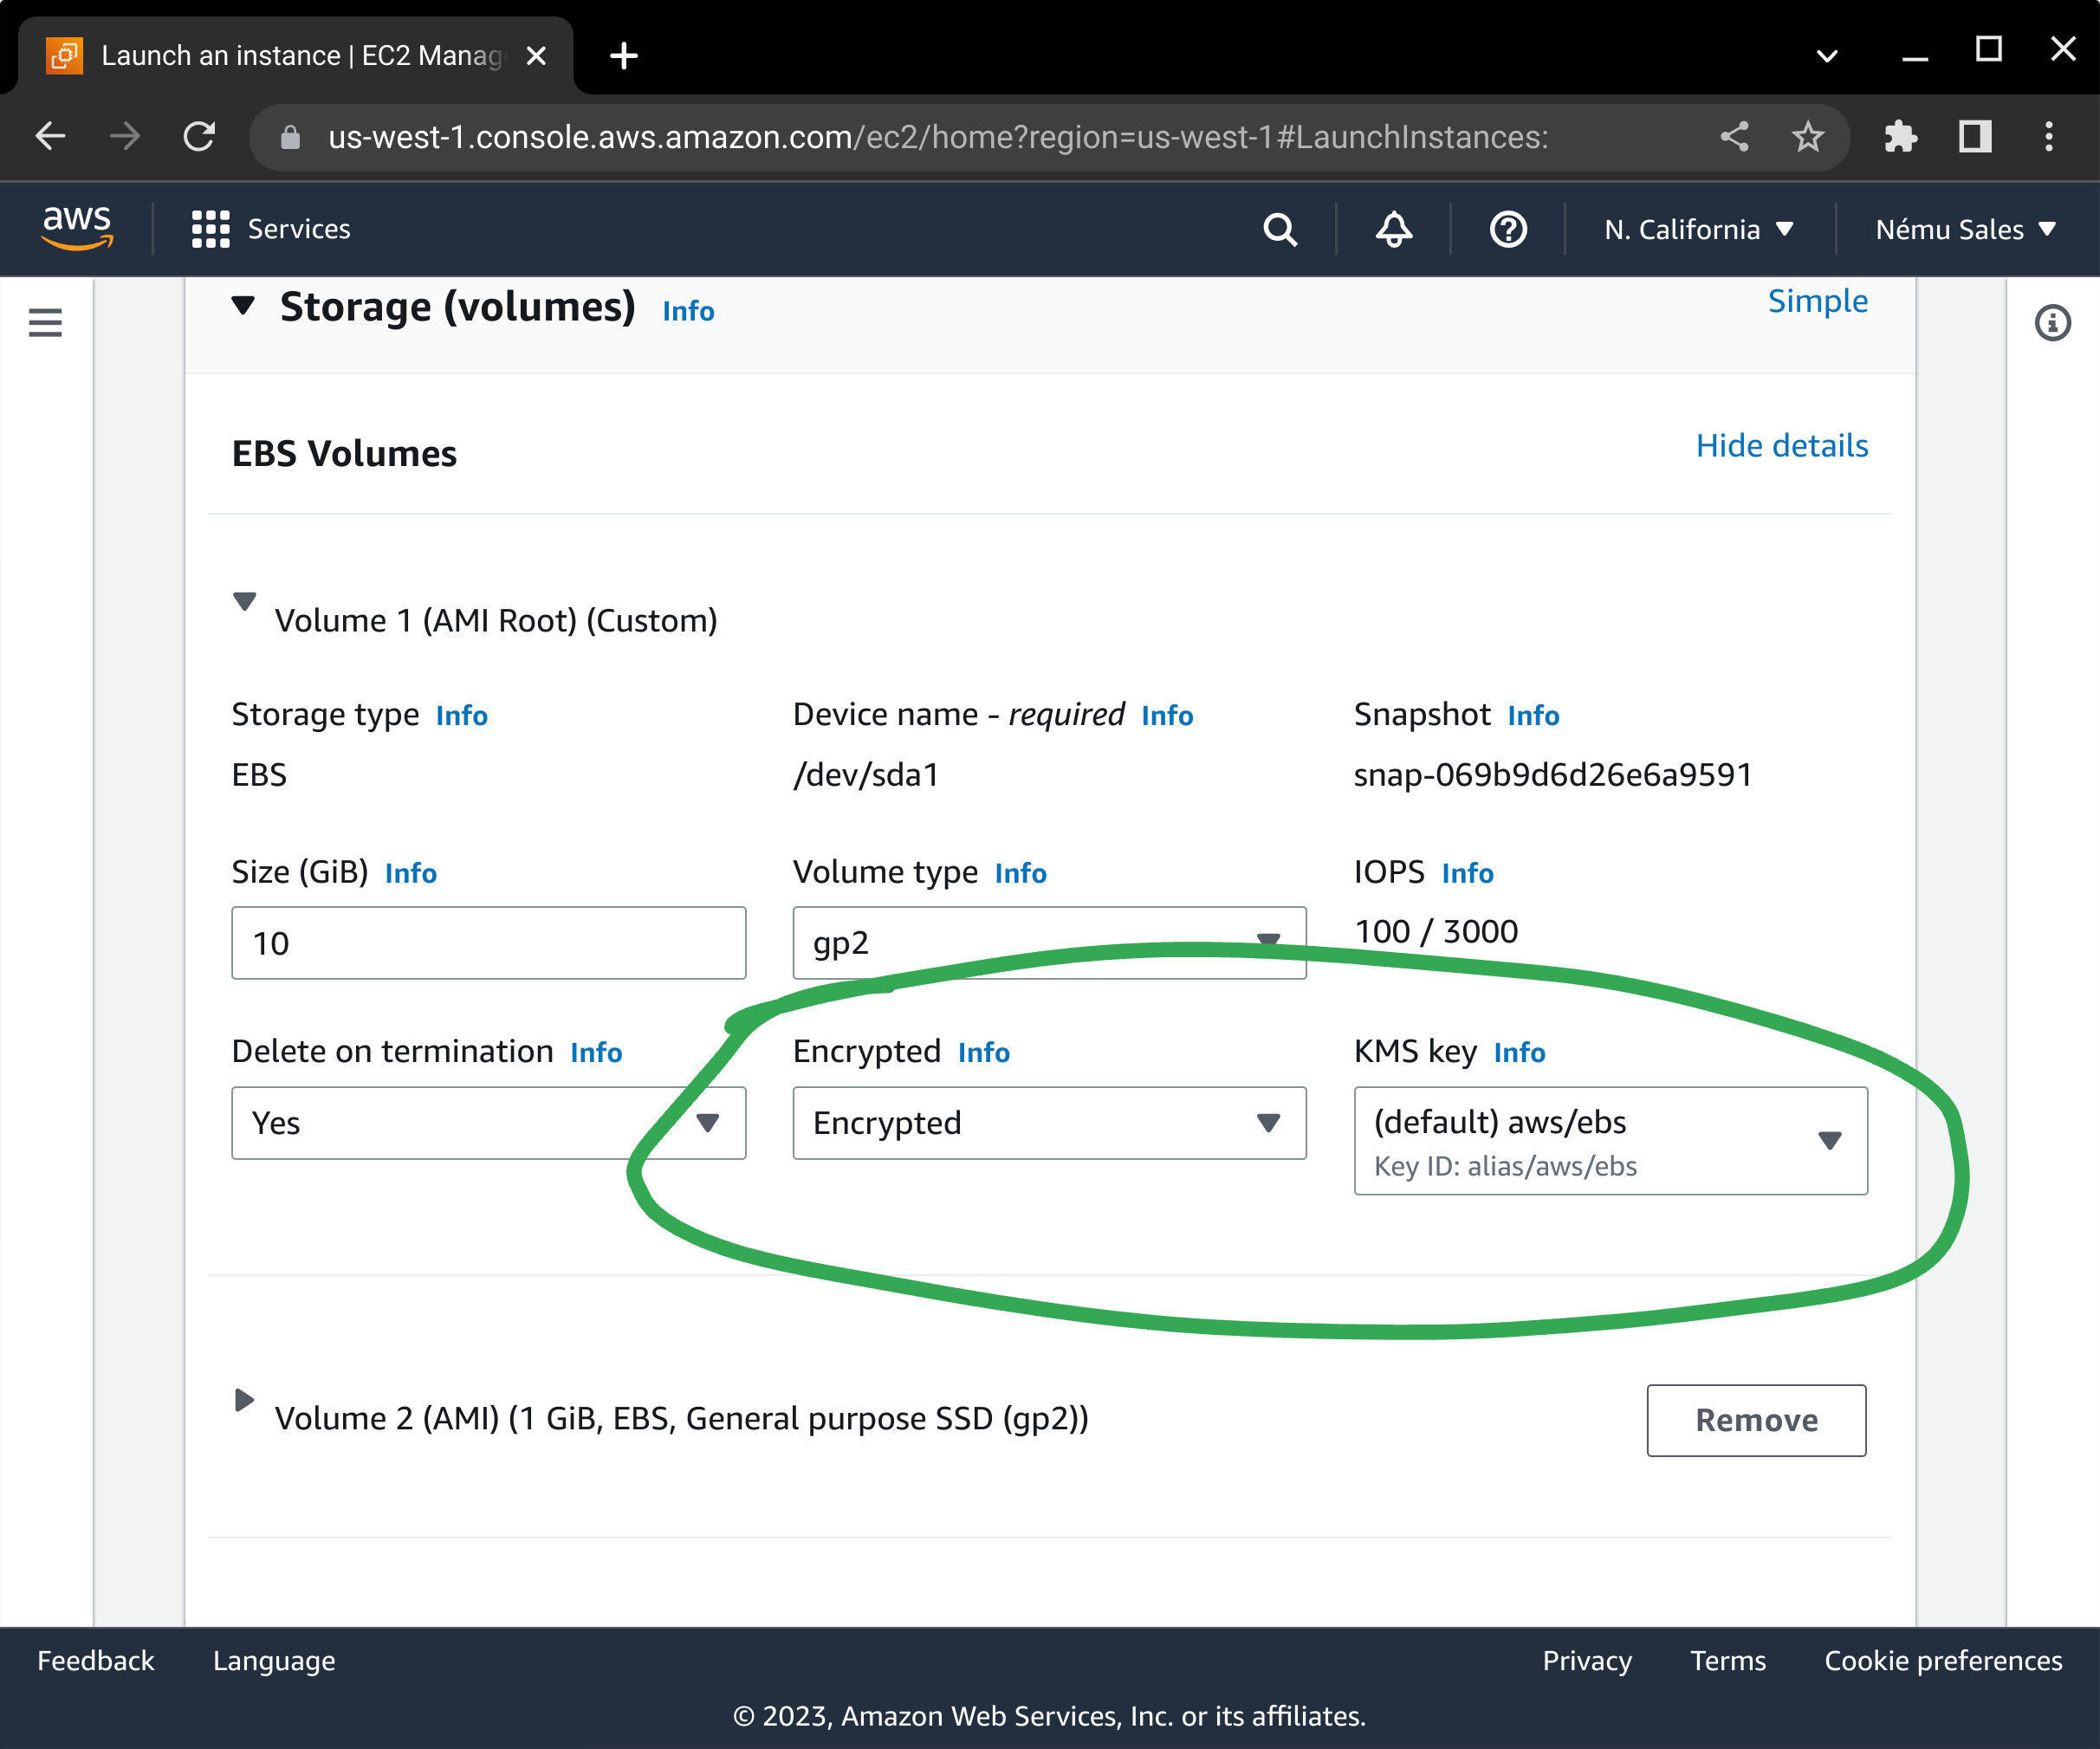
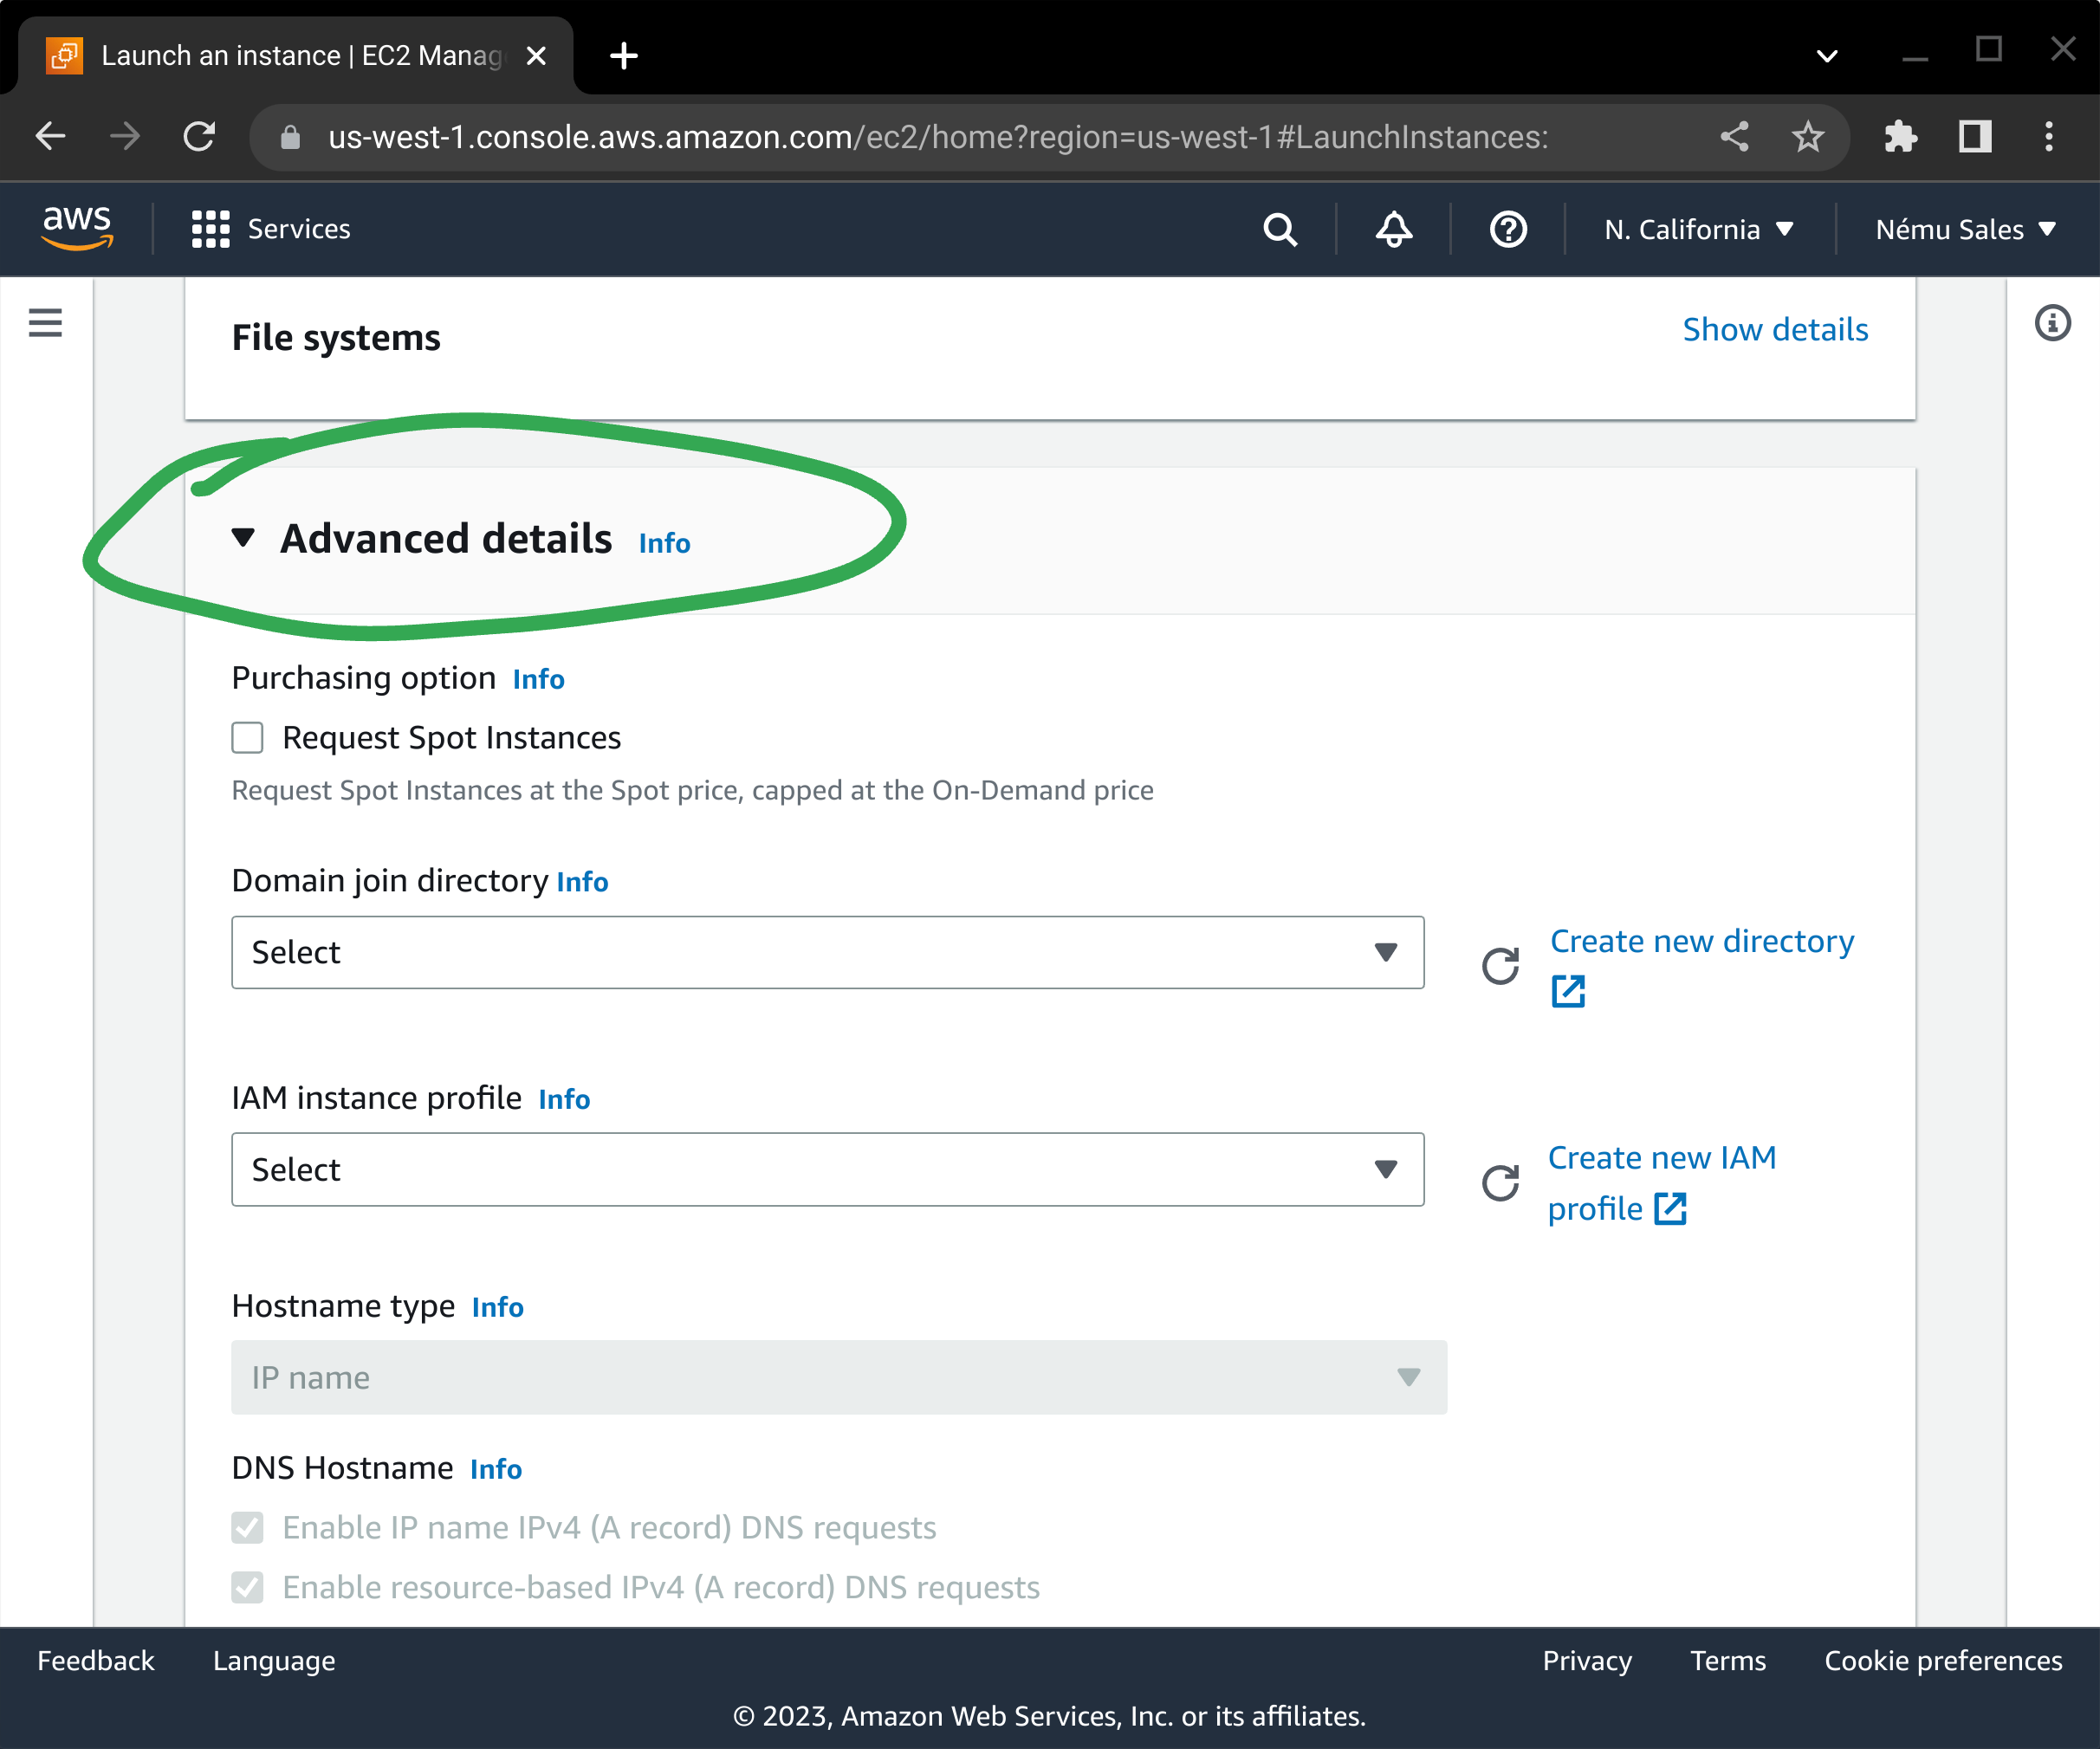
Here is one area where the process differs from normal: Where required, our AMI splits your operating system out into separate volumes for user files and log storage, to ensure STIG compliance. Tune the sizes of the volumes as appropriate. You will need to click on the Advanced link to ensure you are able to enable Encryption for each volume: The security of your data-at-rest depends on it, and it is incumbent on you to make sure this is enabled in order to maintain your security posture. It is also important to ensure you select the appropriate volume size and volume type to meet your storage and performance needs.
Depending on which AMI product you are subscribed to, you will see either one (Ubuntu, SLES), four (older RHEL), or five (newer RHEL) volumes attached to your instance. The filesystems on these volumes (as of our 2024-09 AMI release) will automatically be extended at first boot to match the settings you configure on startup in AWS.
The following list describes the purpose and mountpoint of the volumes we ship with our products:
- /dev/sda1: Root operating system volume; Ensure you have enough storage for system updates.
- /dev/xvdx: Audit file storage (/var/log/audit)
- /dev/xvdl: Runtime file storage (/var)
- /dev/xvdh: User home directories (/home)
- /dev/xvdz: Log file storage (/var/log)
The names of these devices within your EC2 instance will depend on which instance type you select, however on most modern EC2 instance classes will be /dev/nvme*. The filesystems created are labeled and can be enumerated in the /dev/disk/by-label directory.
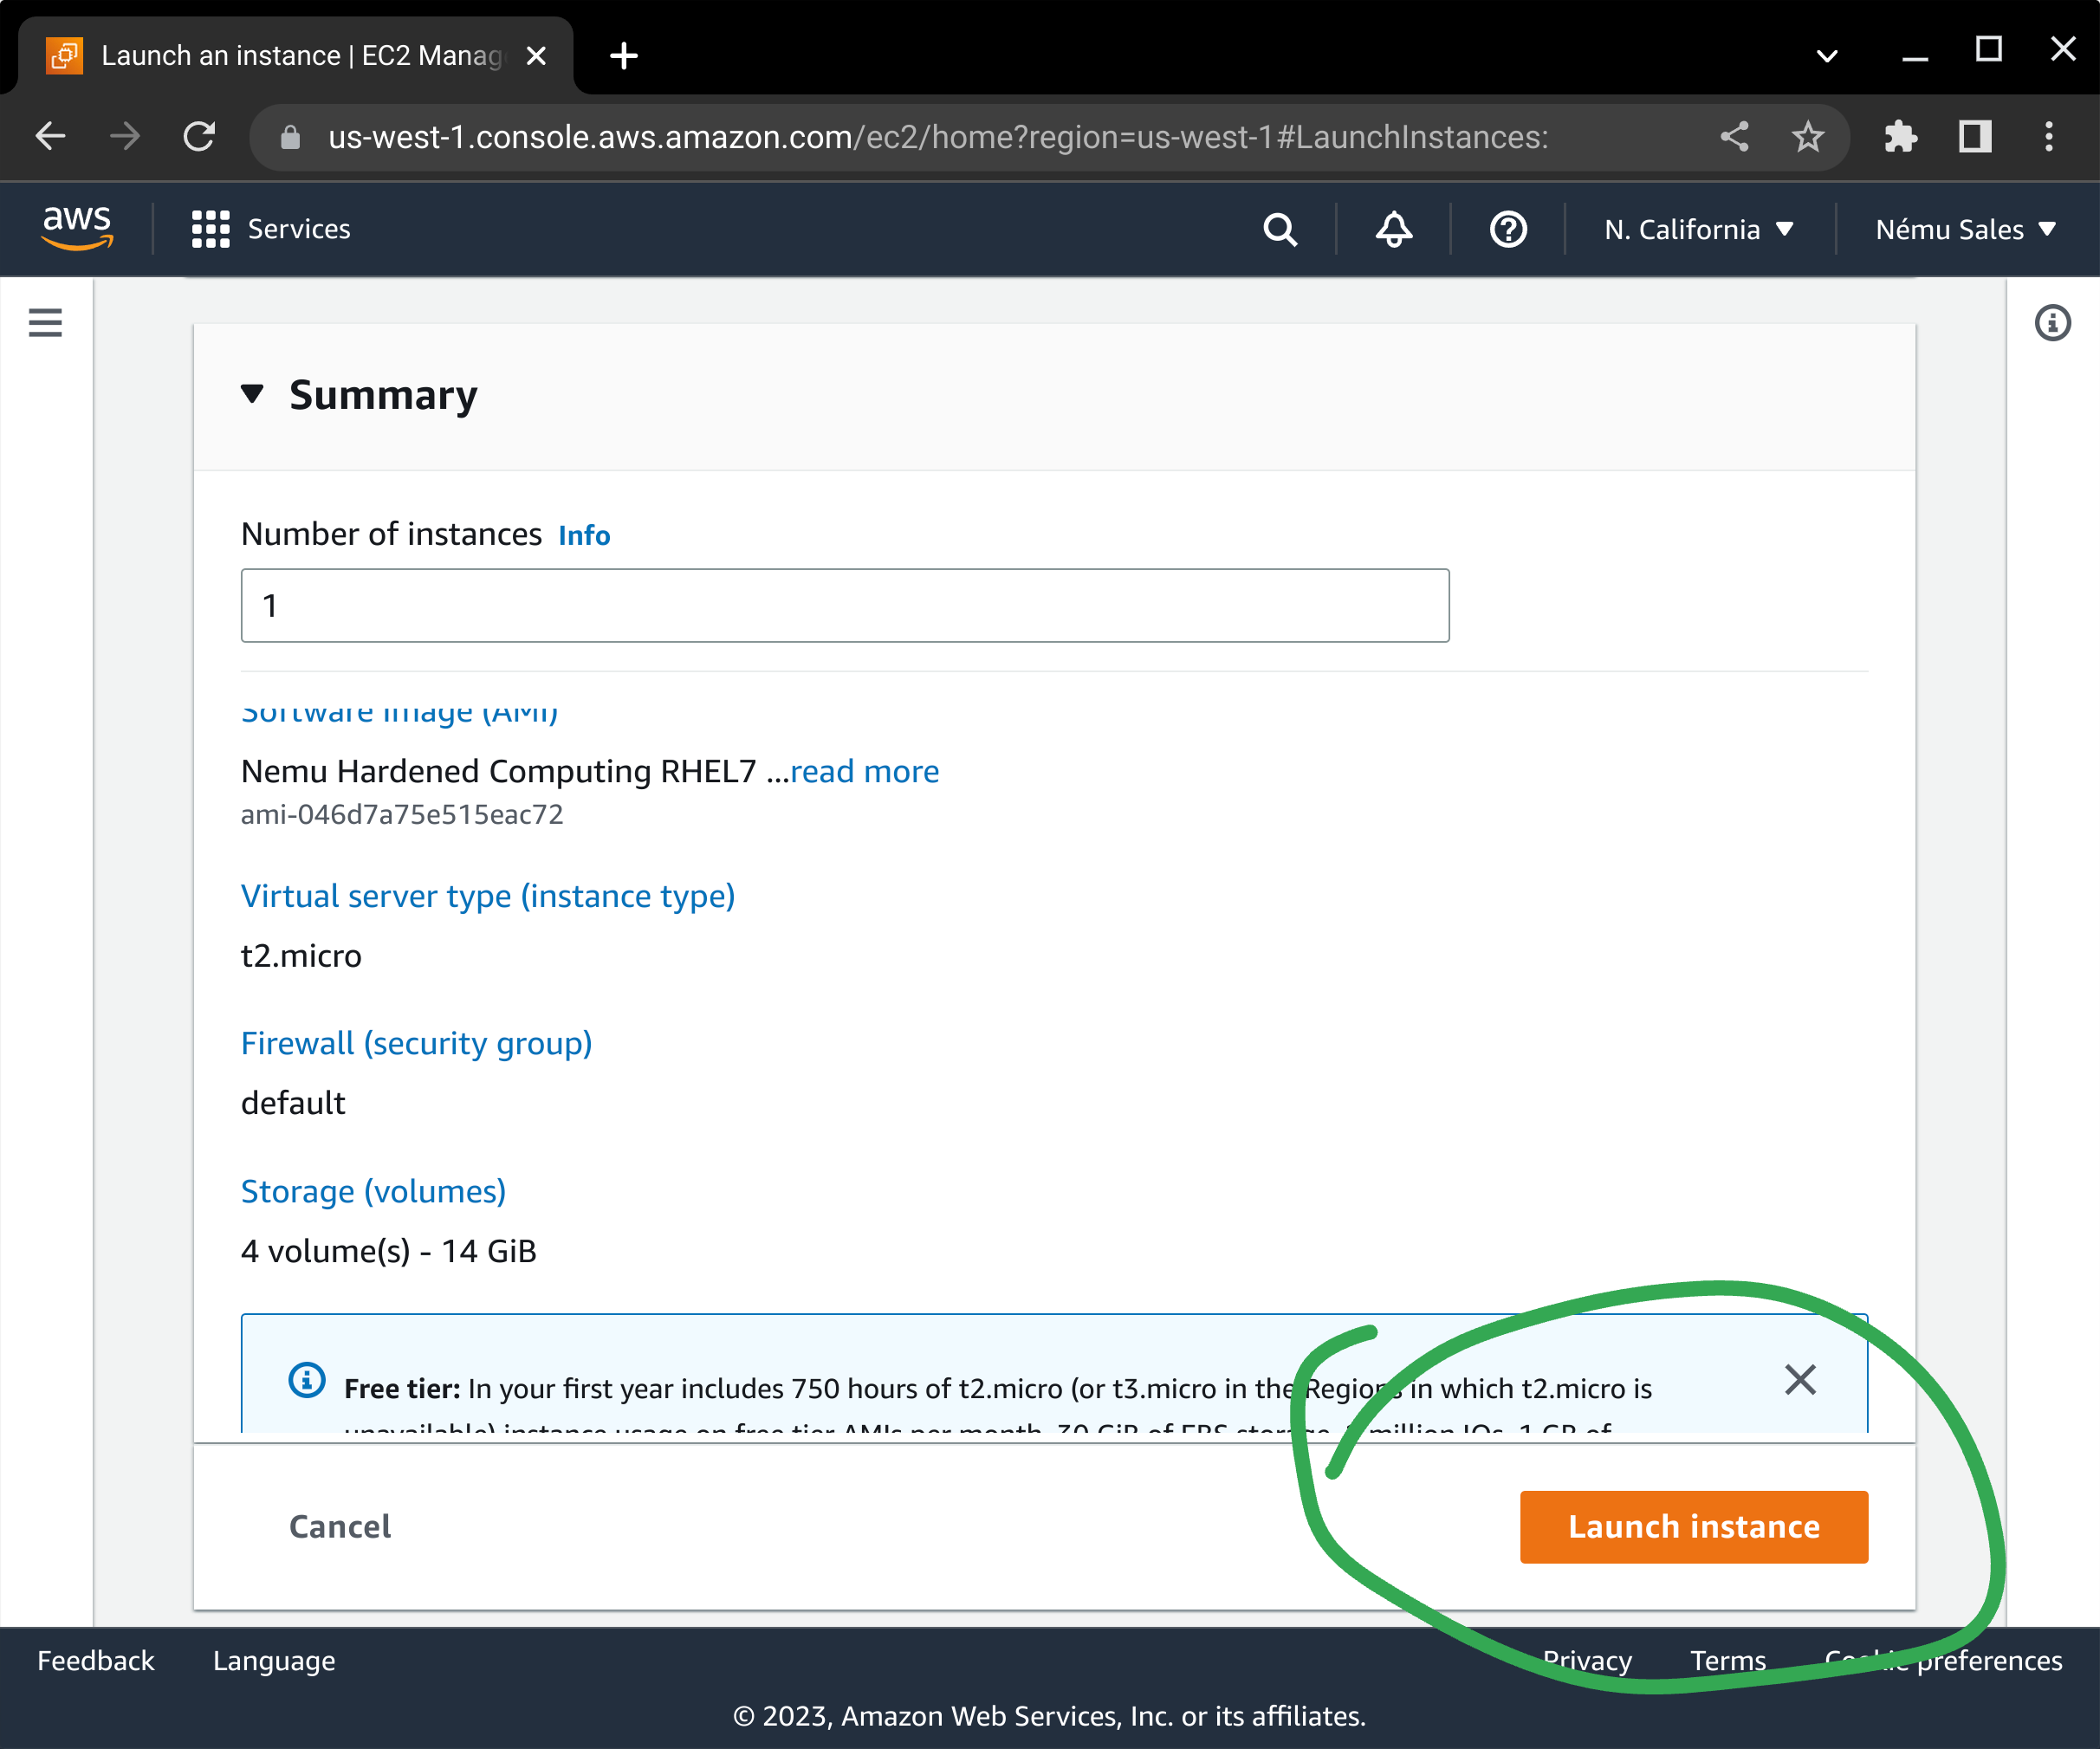
Review the summary information at the bottom of the screen and press Launch instance to begin the EC2 deployment process.
At this point, your EC2 instance will be started and you can manage it as you would any other instance in your environment!
AWS CLI Build Process
Content under construction
CloudFormation Template Example
Content under construction
Post-Deployment Package Updates
Our Linux AMIs are not configured to automatically update software packages within the running instance. It is your responsibility to ensure security updates are applied in a timely manner. Failure to do so may result in system compromise or denial of service.
On RedHat-based AMIs, the following commands can be used to install in-place updates:
$ sudo yum --nogpgcheck update -y
$ sudo reboot
On Ubuntu-based AMIs, the following commands should be used:
$ sudo apt update
$ sudo apt upgrade -y
$ sudo reboot
On SLES-based AMIs, use Zypper instead:
$ sudo zypper update
$ sudo reboot
Customers are strongly encouraged to utilize AWS Systems Manager Patch Manager to automate this task wherever possible.
Getting Help
We understand that it is sometimes difficult to get your application running on hardened operating systems. If you are encountering errors or problems trying to run your application on our AMIs, please be sure to check the knowledgebase to see if there's already a solution, and reach out to our support team if that doesn't fix it. While we may not know everything about your specific application, we have seen many of the components that are used to build them, and are more than happy to help you get things running!